
Project Description
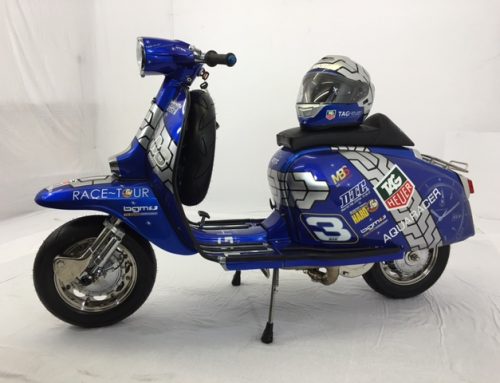
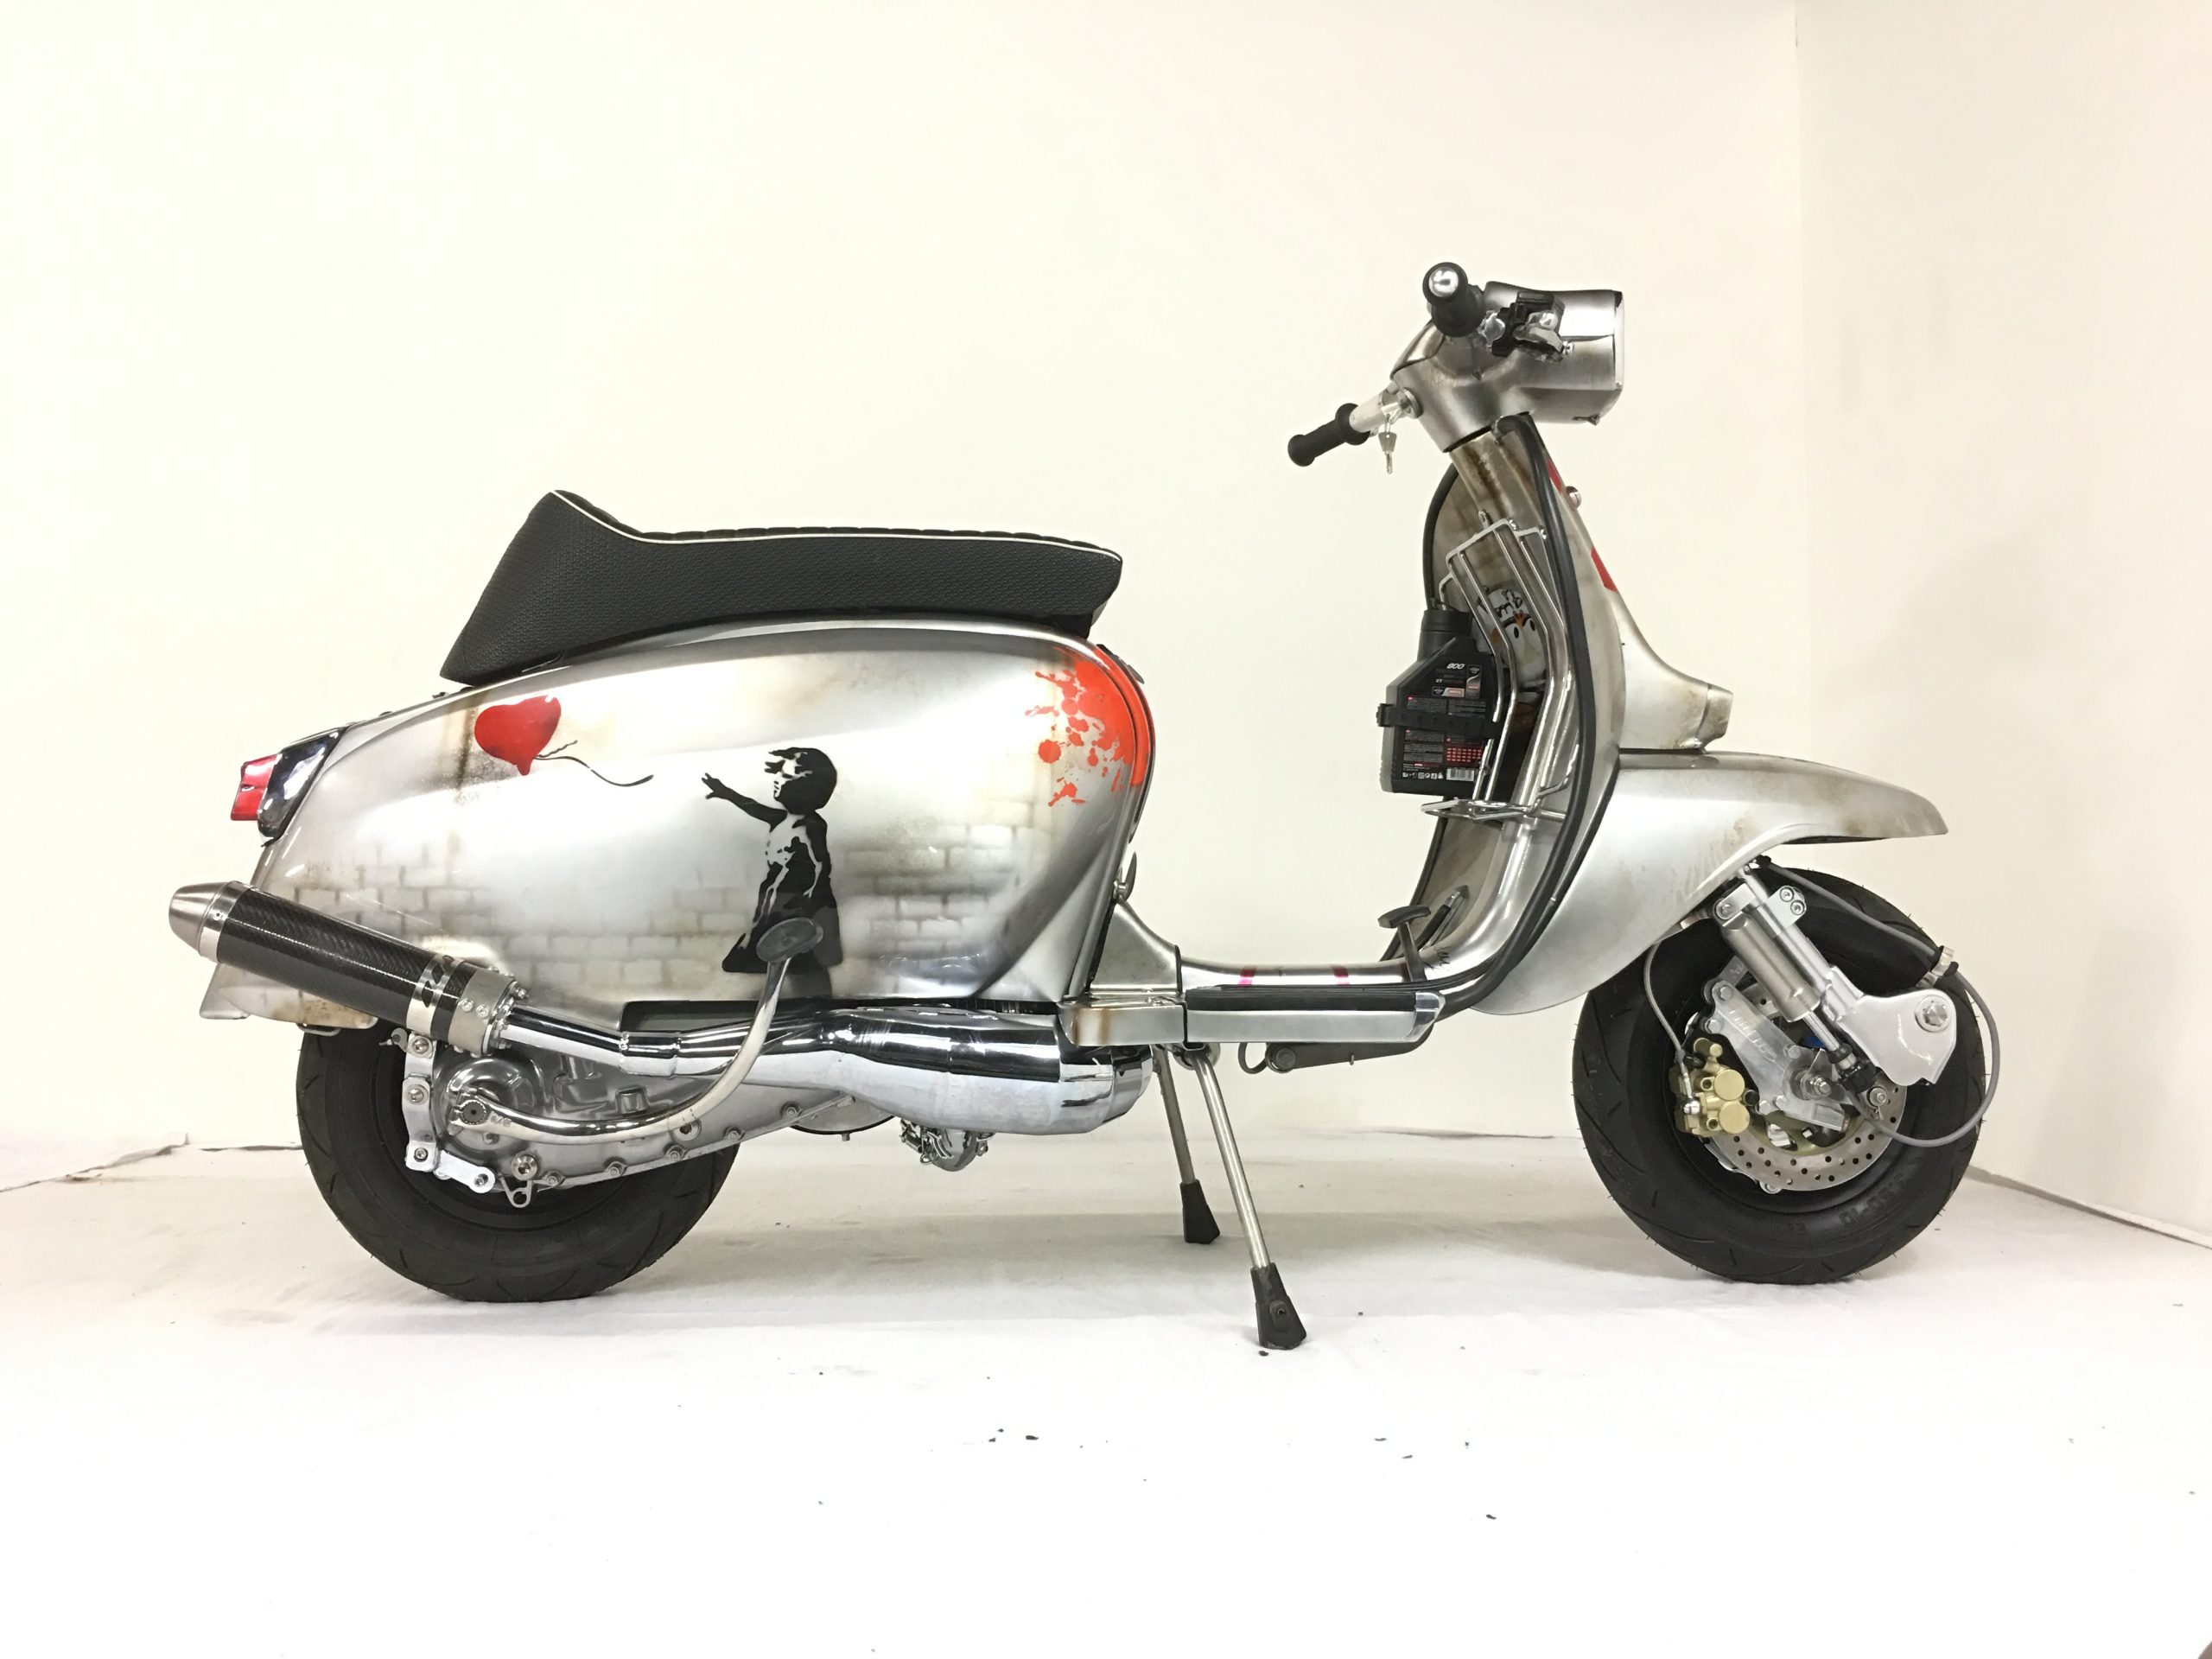
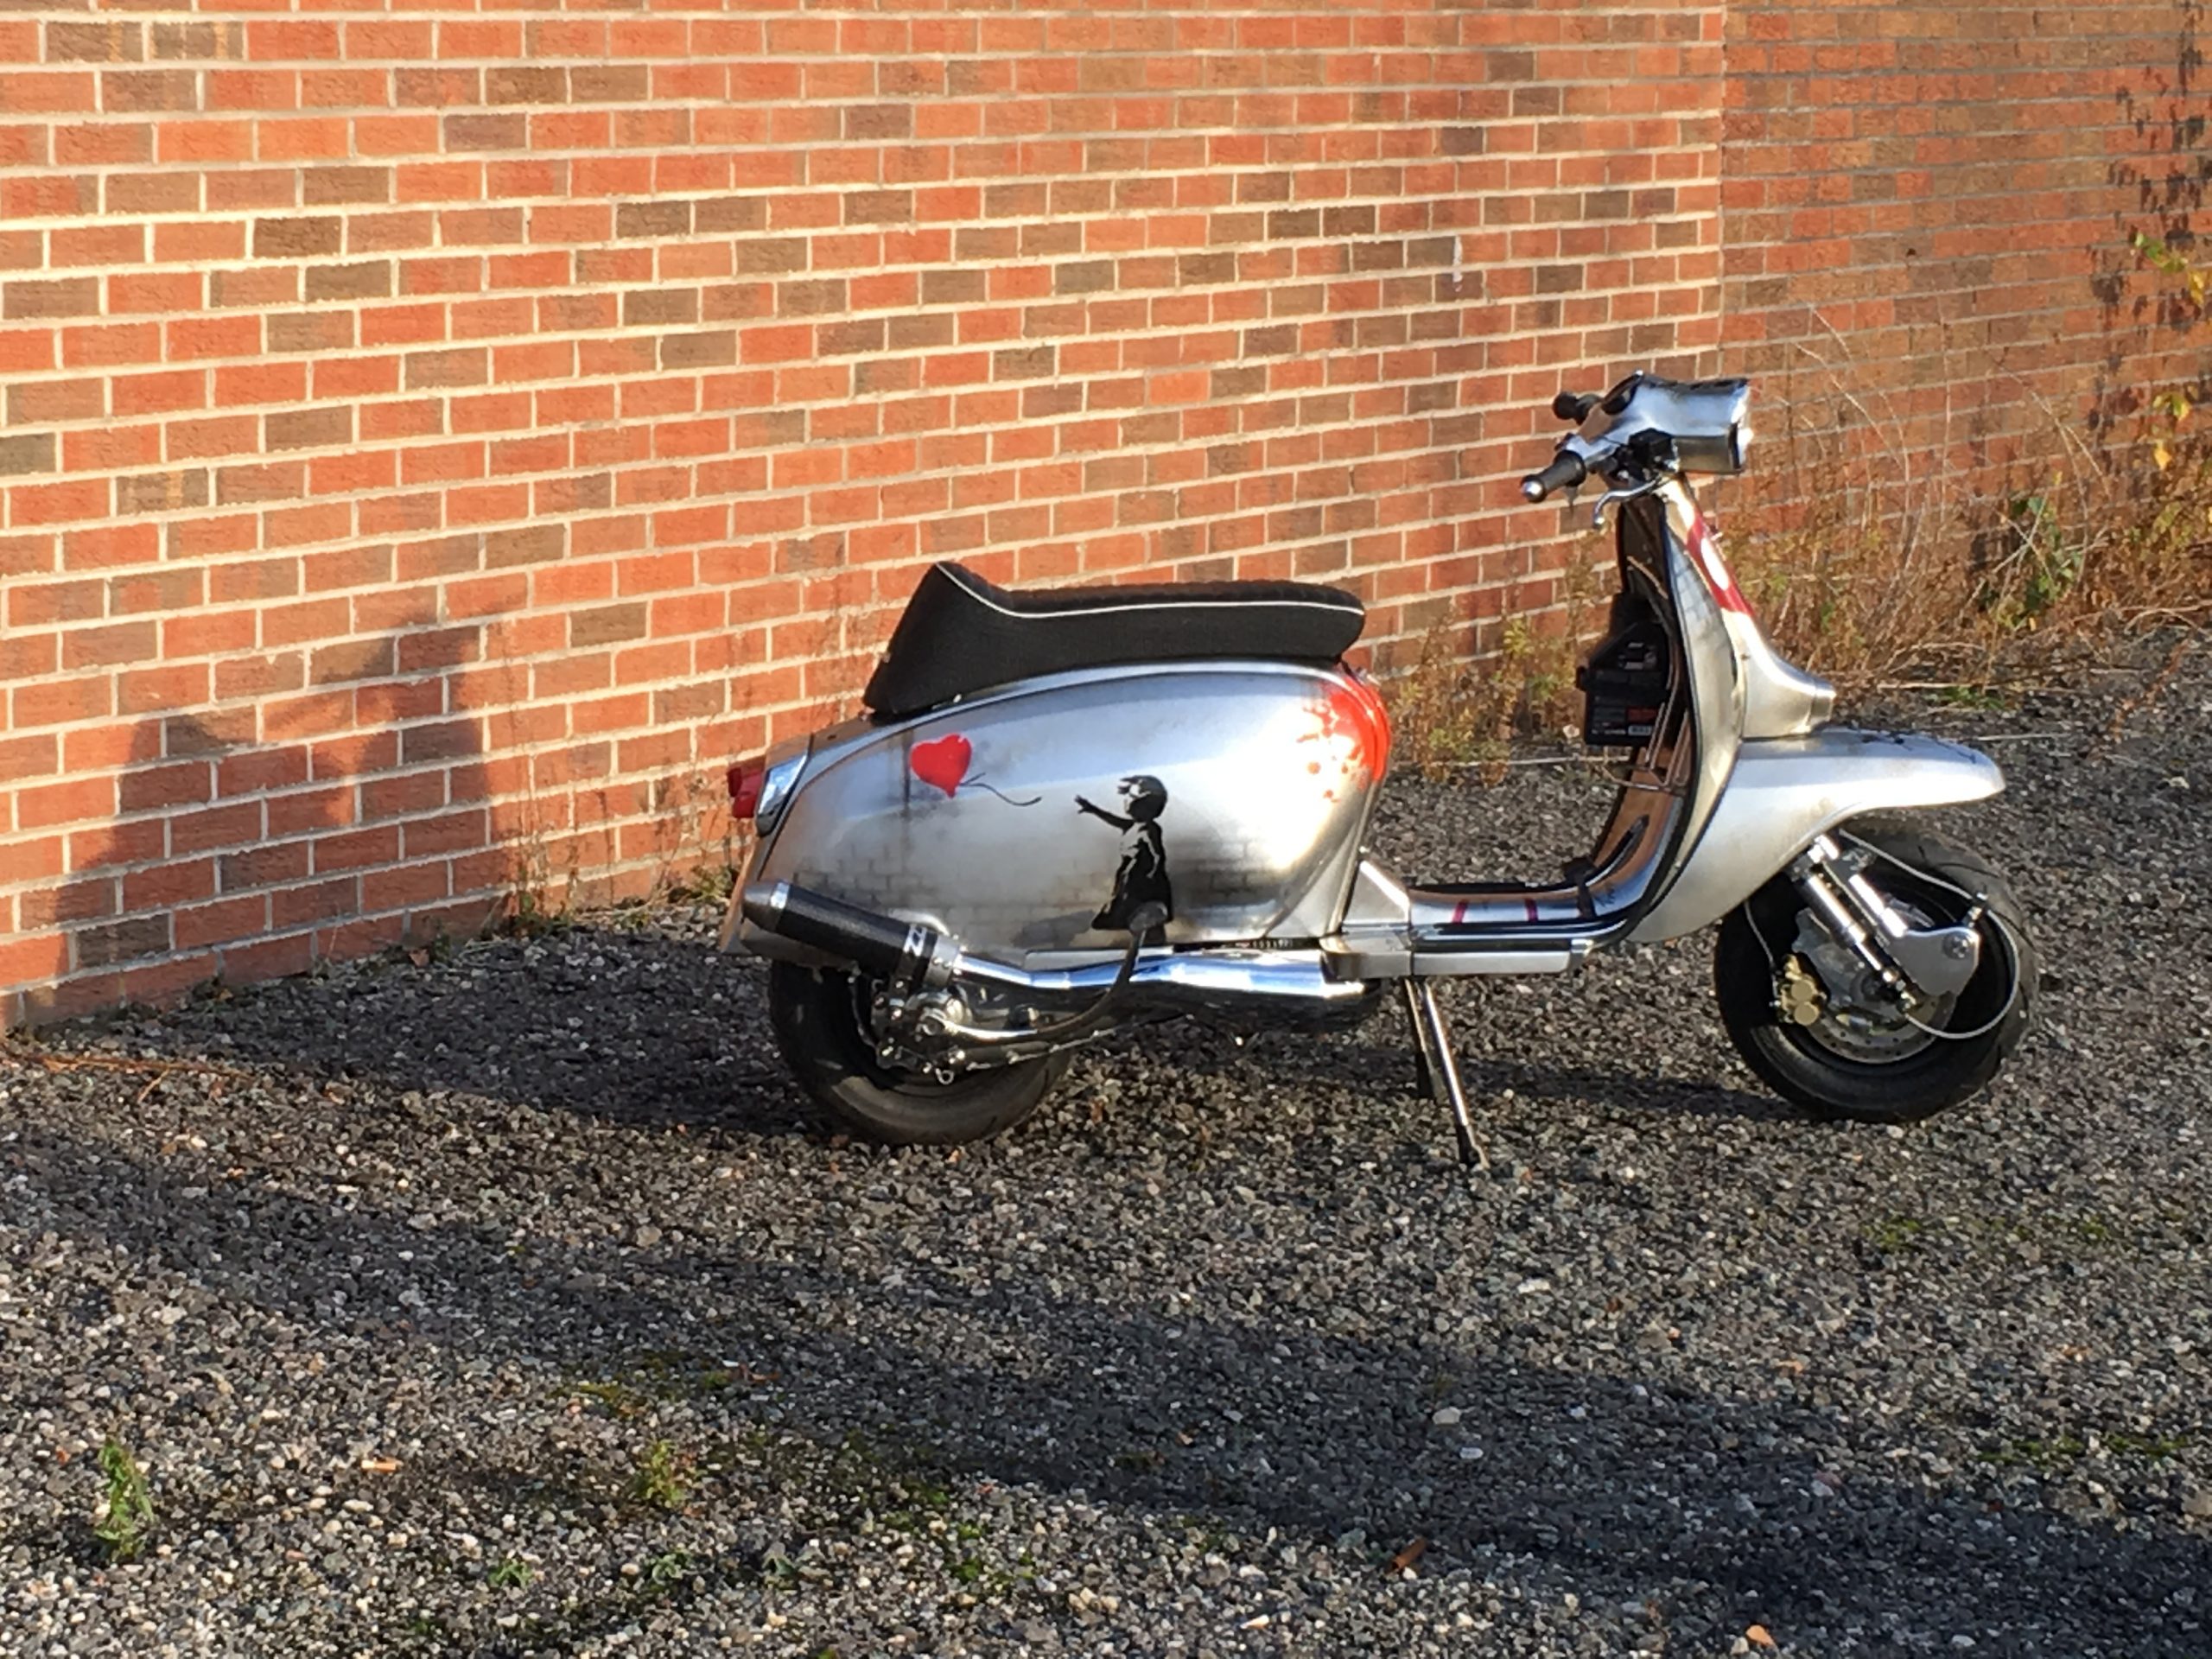
Lambretta GP240 Bansky

Markie Says: “Built for my friend from over the seas – Stonky”
Lambretta GP240 Banksy
This Scooter is owned by Stefan Onken or as he likes to be called ‘Stonki’. He’s been a customer and friend for over 25 years. He ran a Scooter business ‘Nordspeed’ in Wilhelmshaven near Hamburg in Northern Germany and I think was possibly my first Dealer customer from Germany. I still remember his first visit in a Fiat Uno, which surprised me, but he said it ran perfect all the way. If you’ve seen my old Yamaha YZ250 engine conversion from the 1990’s – it was originally made for Stonky.
Years later he had shut down the business and moved on, now he’s in charge of 800 employees in the car and motorcycle wholesale trade and now travels the world. As you do, you loose touch, then bump into each other again. I’ve visited him in Hamburg on a stop over returning from Denmark. He’s stayed at my place a few times and we’ve bump into each other at motorcycle shows in Germany and the UK. For years he kept saying ‘I want you to build me a custom scooter’ Then one day I got a message to say ‘I’ve bought a Lambretta and I want it customising’!
The next I know the bike is on the dyno and only gave 18bhp! That was a standard Ts1, 35mm Mikuni and Taffspeed pipe, not great! Stonki asked for 25-28bhp on the new bike.
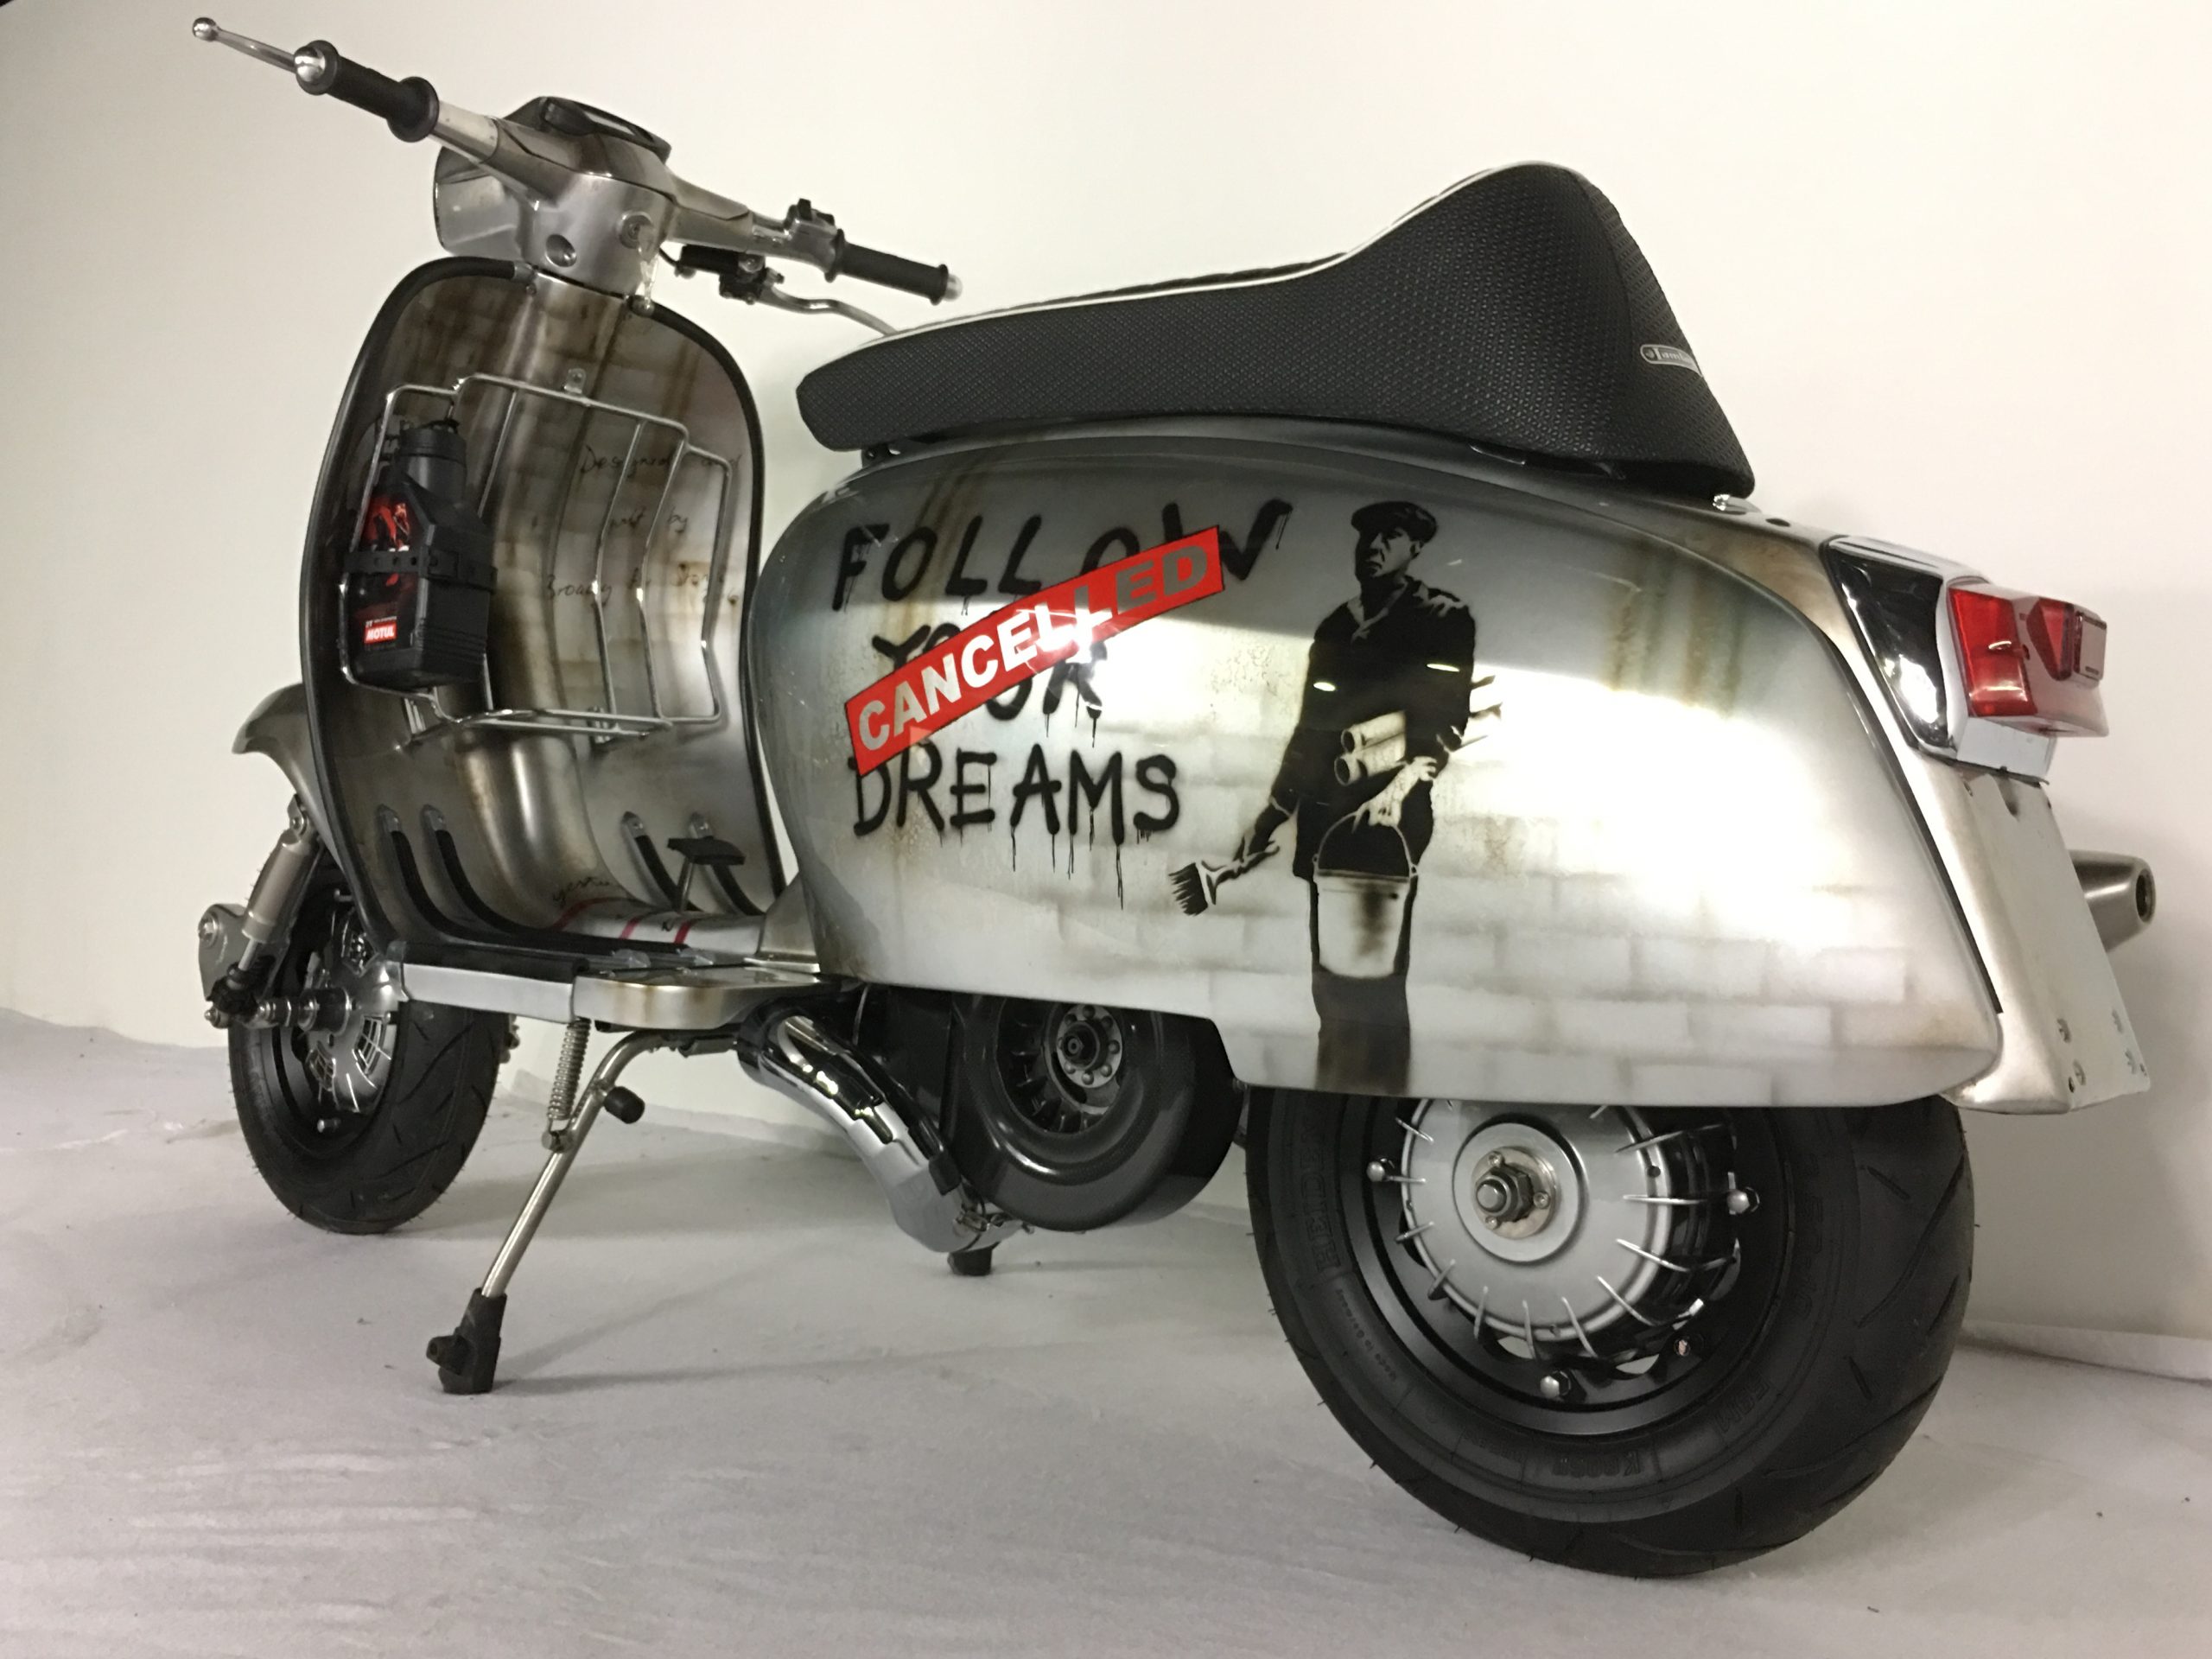
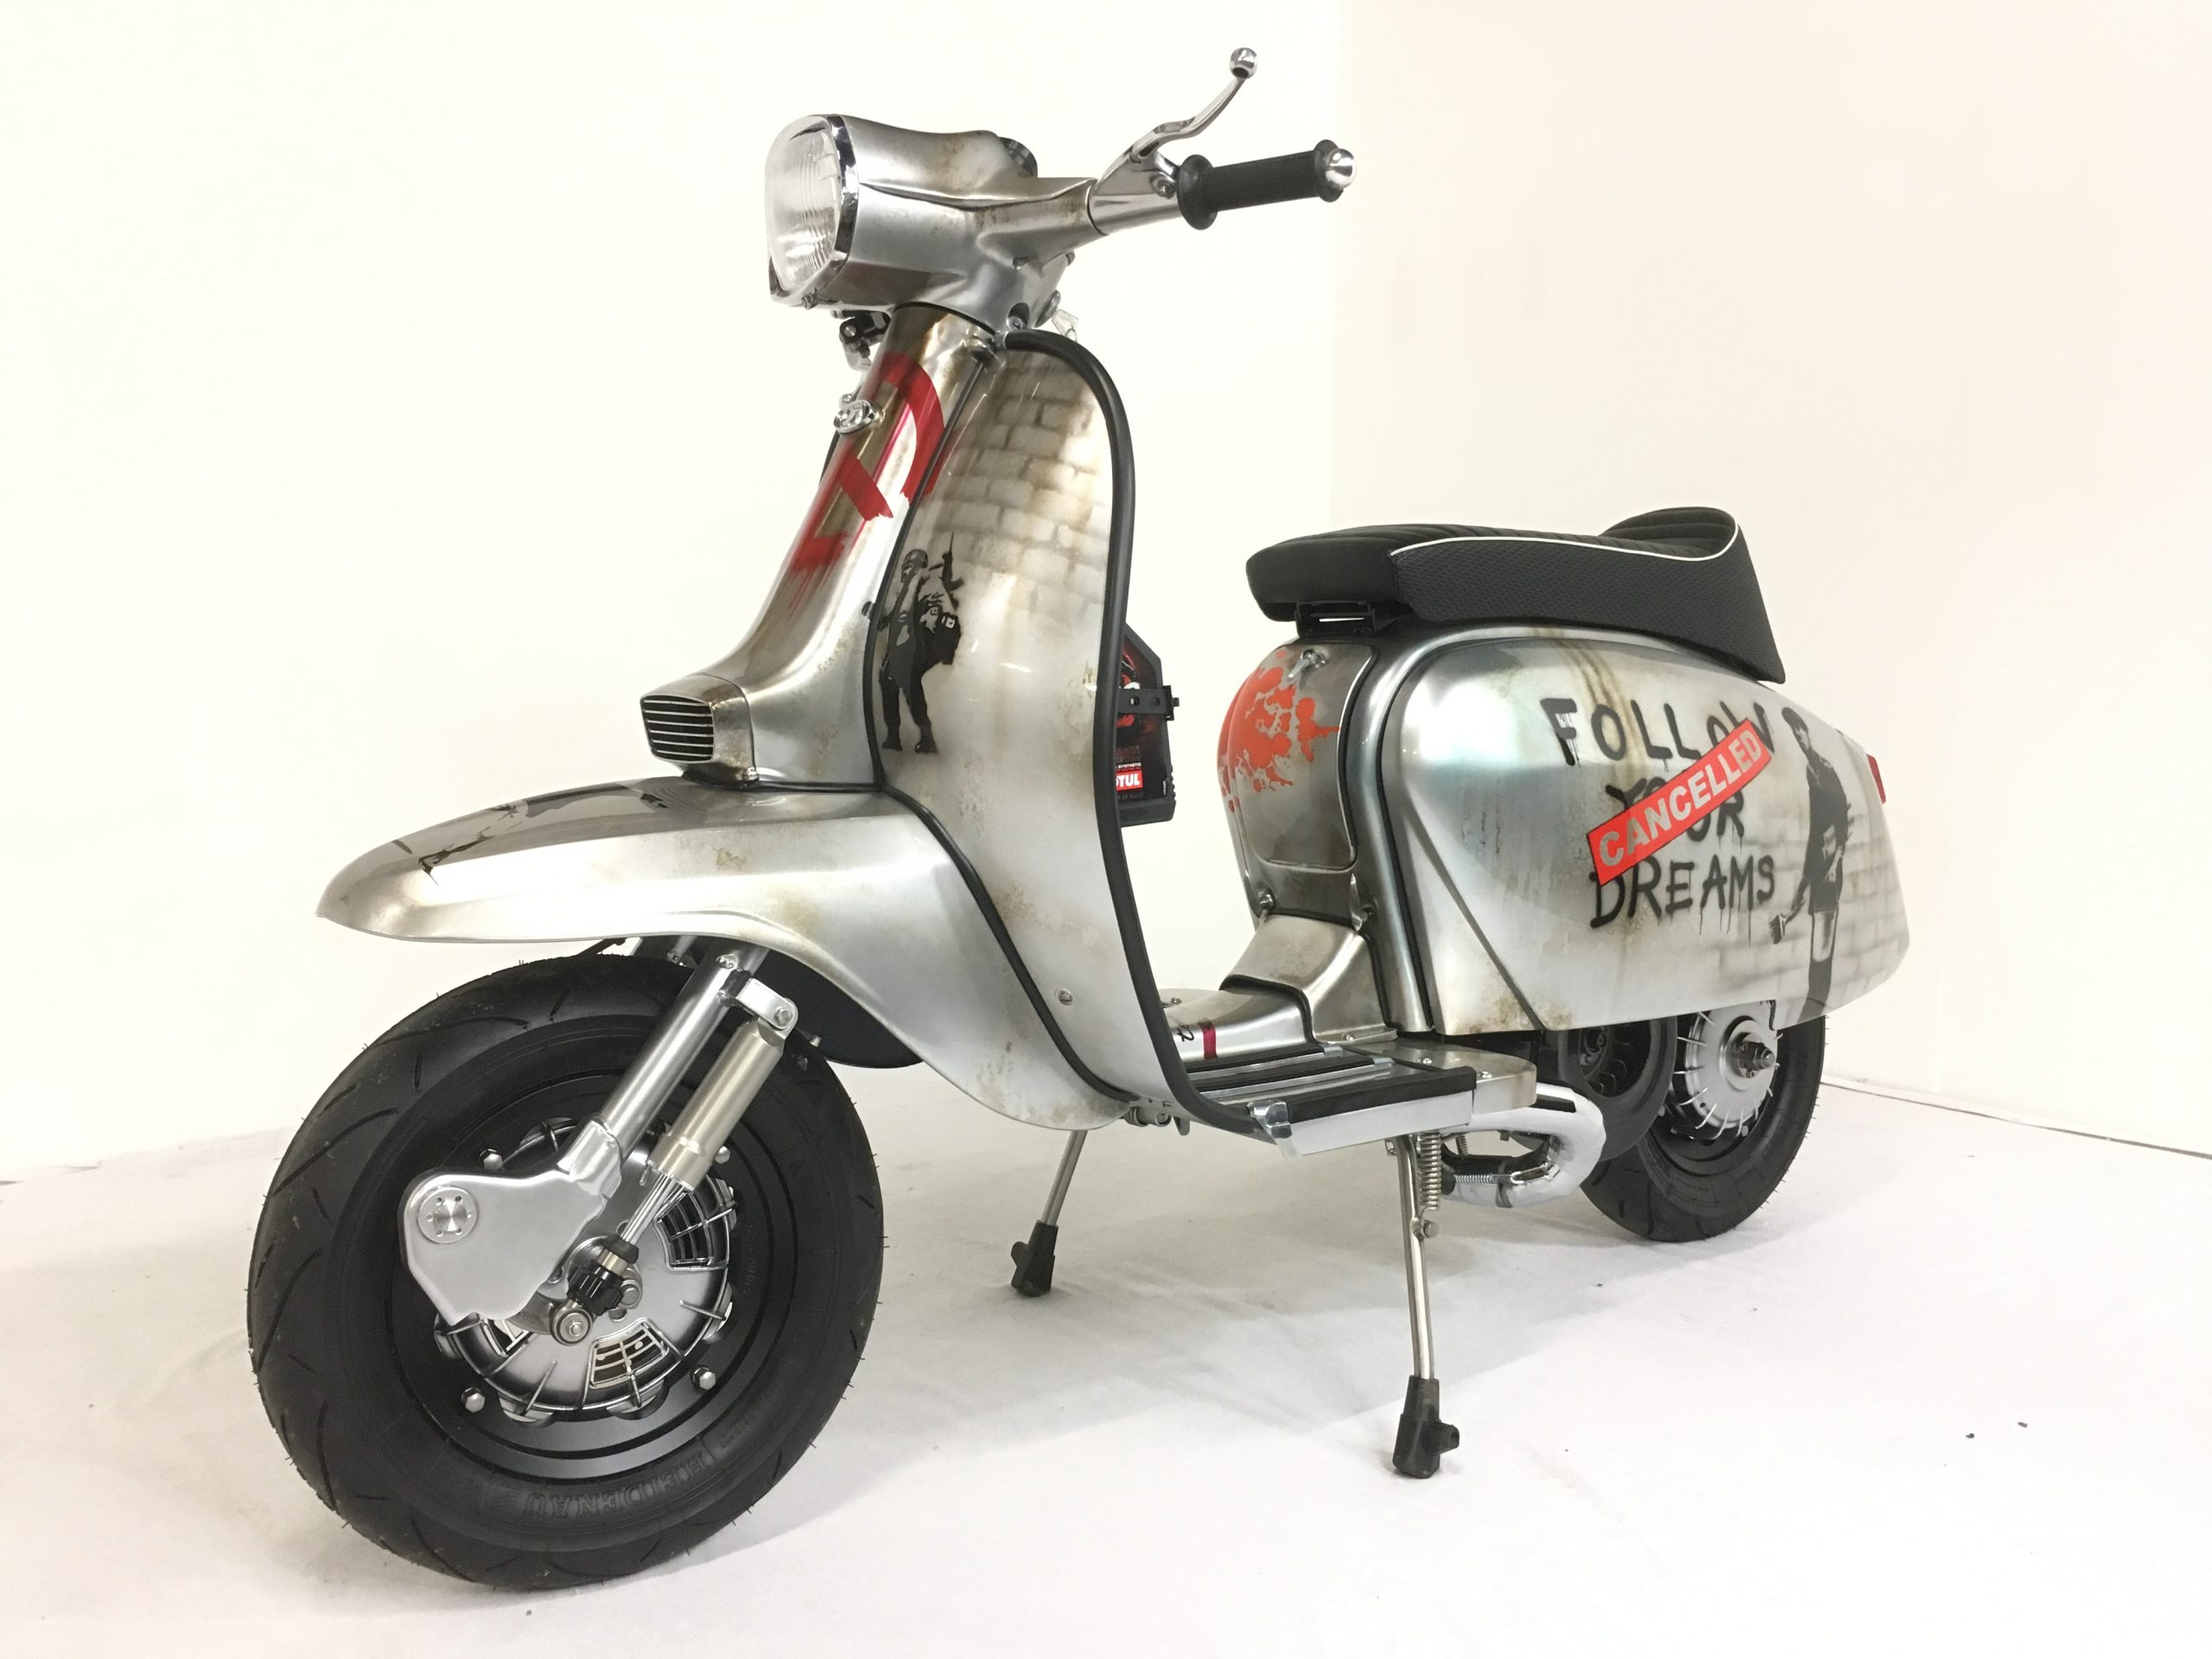
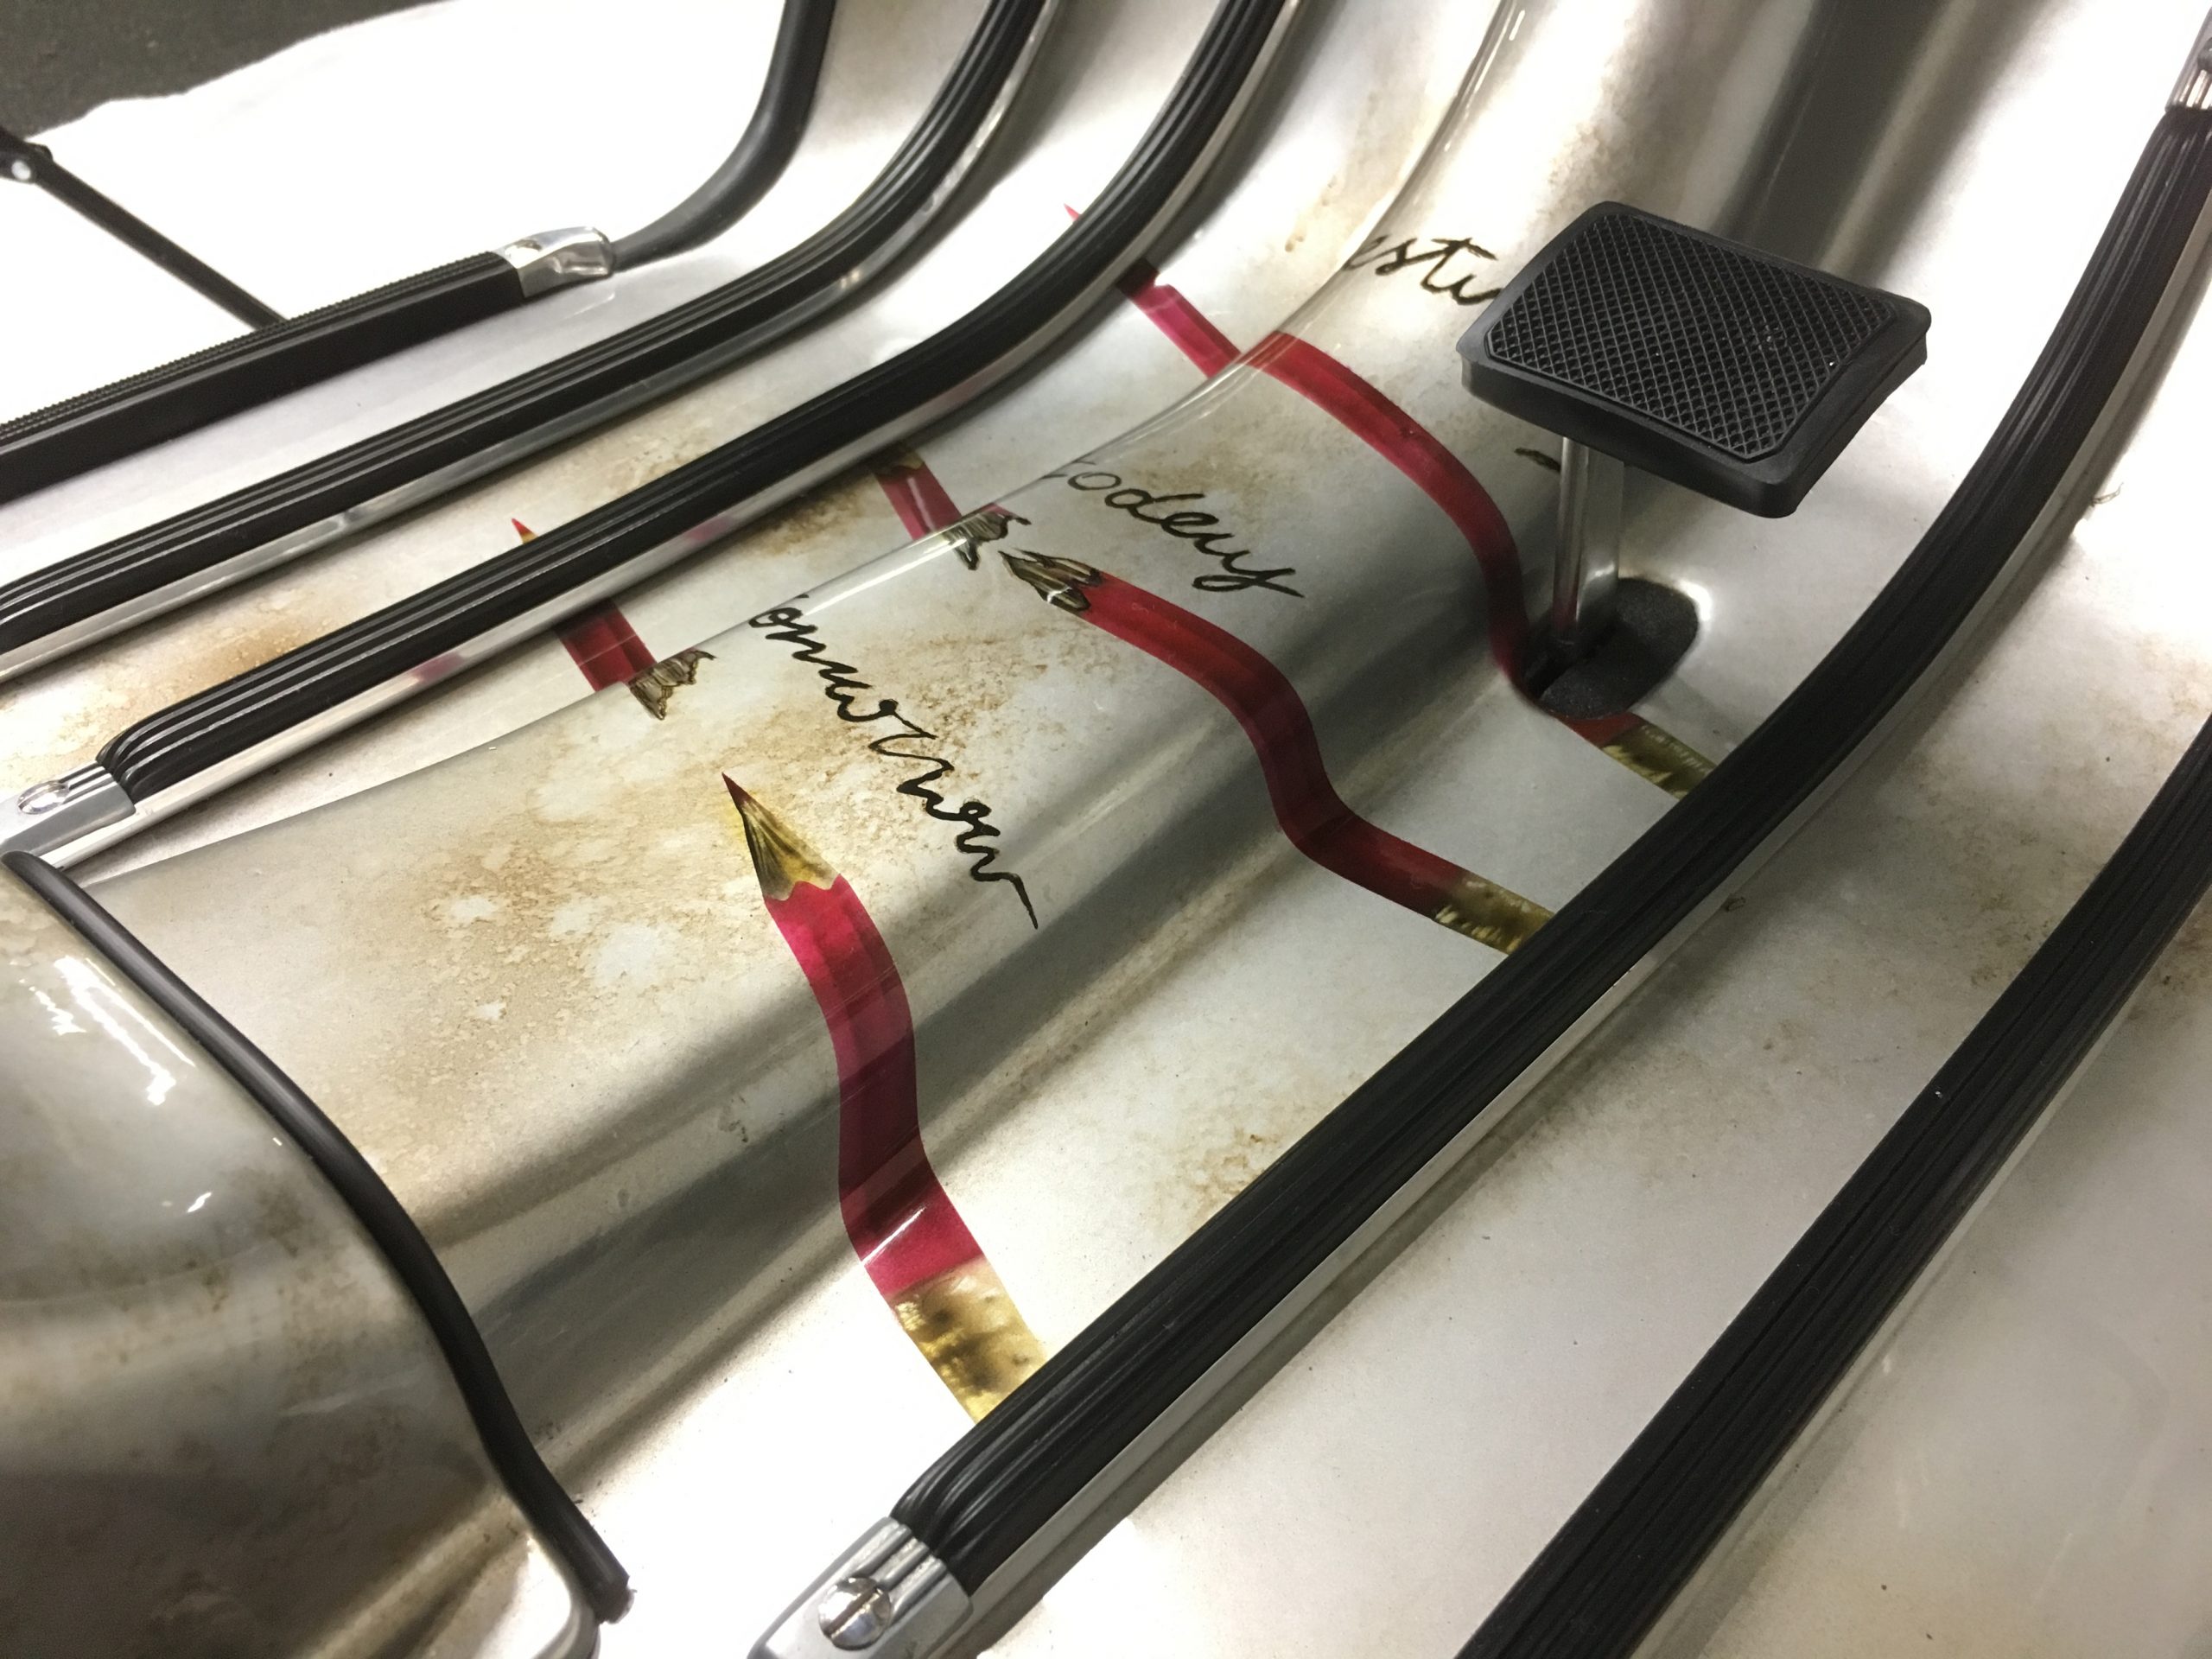
The bike was dully stripped and prepped for spraying. Stonki had the idea of Banksy murals, he supplied the ones he wanted and worked out where on the bike he wanted them – and after that – the rest was up to me.
It was the time when we were promoting the Scootronics Gamma Tech speedo and thought what a great way to plug it. But the bug bare was always can you make it fit in a standard speedo hole and Anthony just said ‘it will never happen’. So I cut up the headset and made it fit and reshaped the top so the Gamma Tech looked natural.
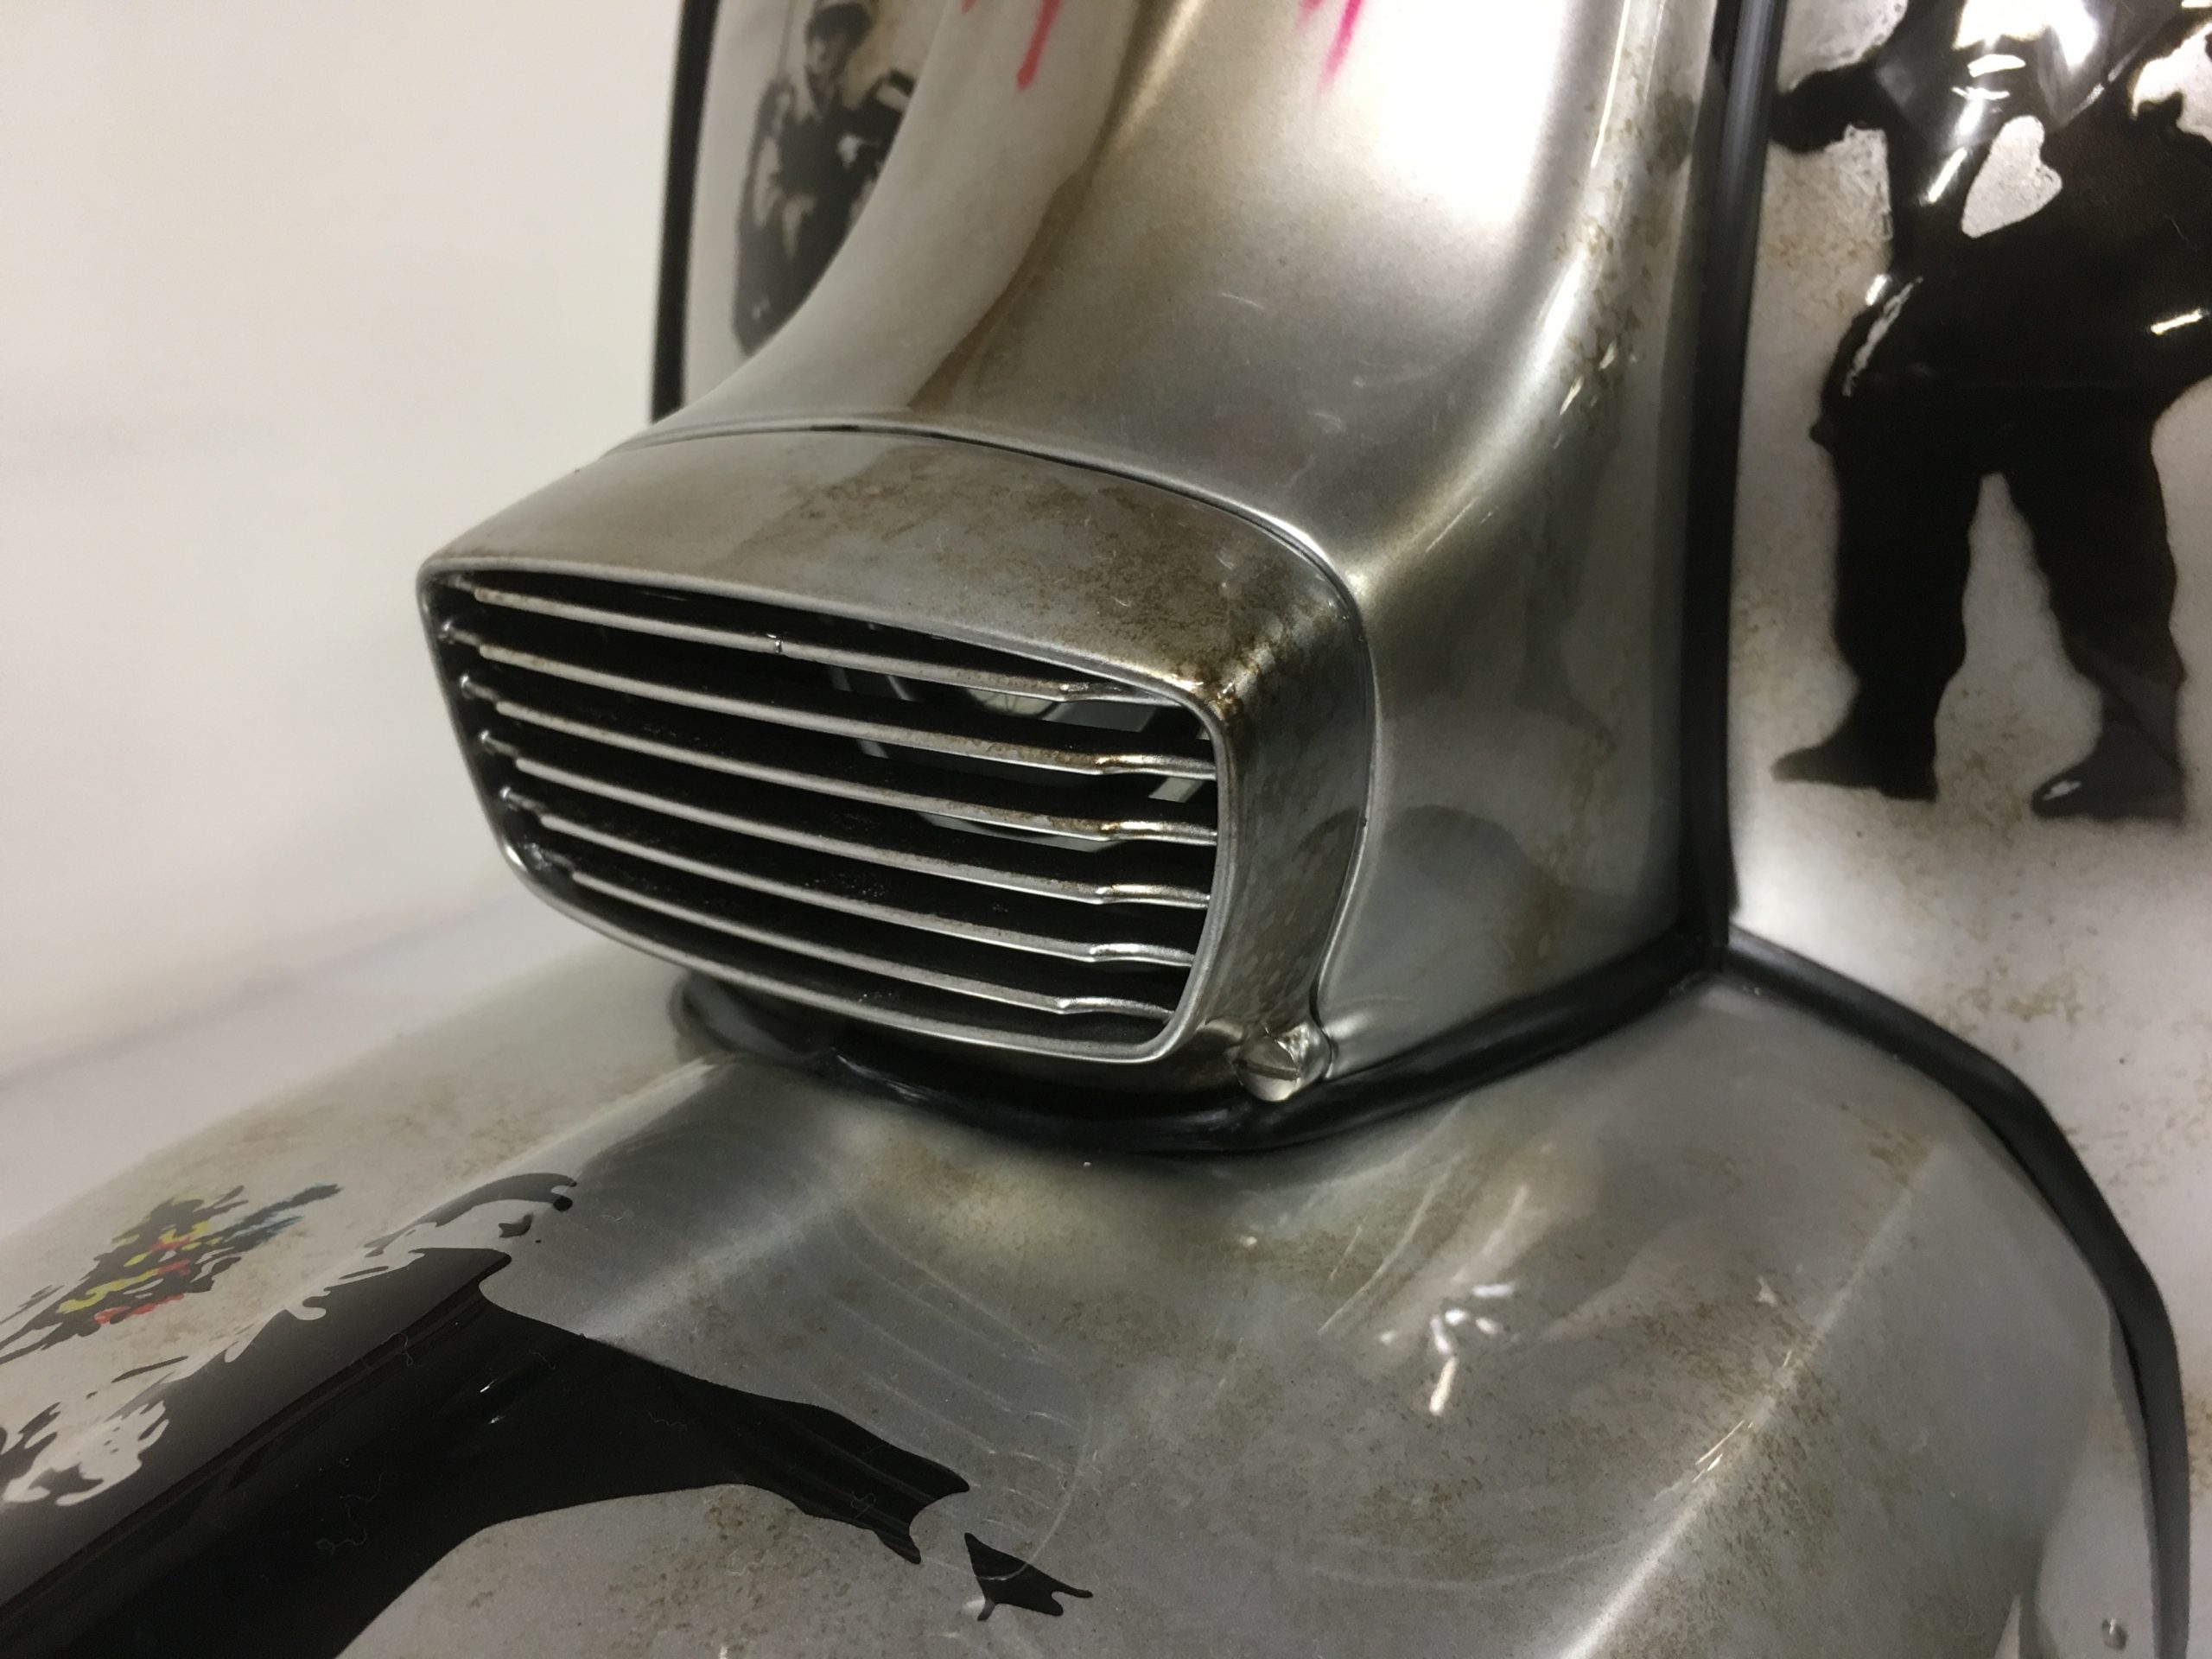
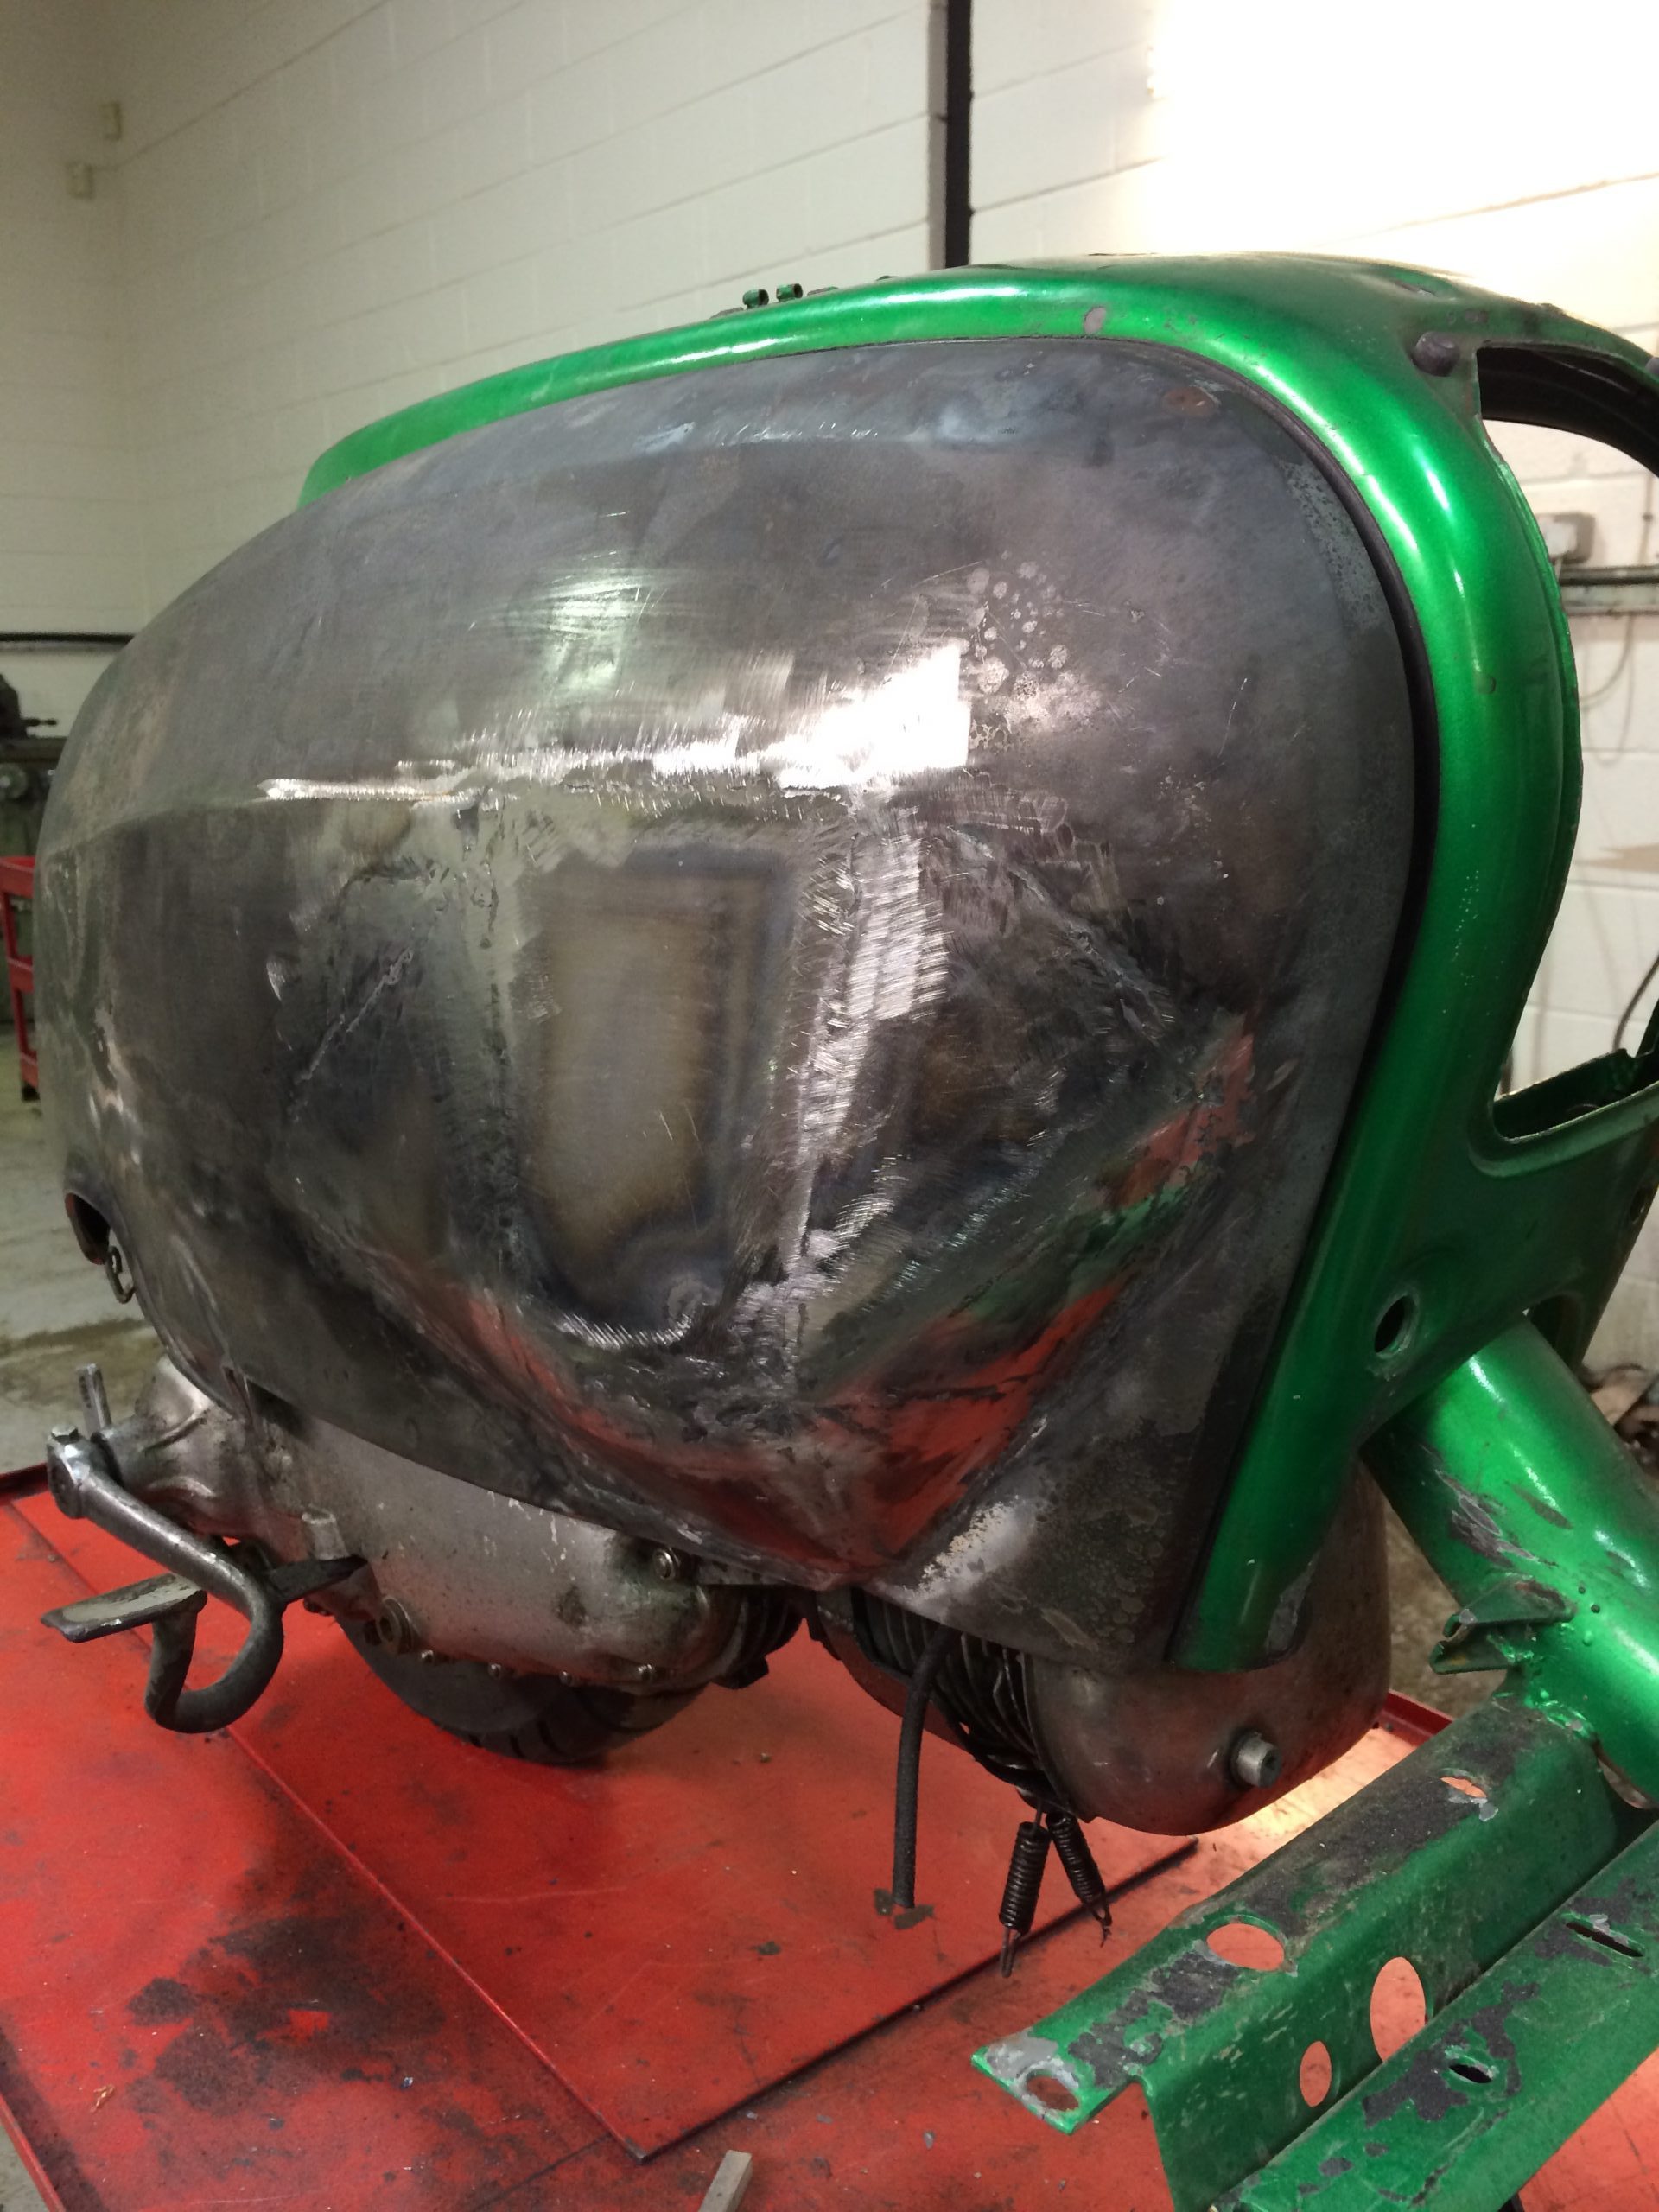
I was originally going to use the supplied TMX and wanted a filter on it, it would have been easy to just cut a hole in the panel – but not me! So set about cutting, welding and English wheel shaping the ‘bulge’. It was done so well when the bike was finished people never noticed and I had to remove the panel to show them. That done, I cut out the side panels grilles and welded plates and English wheeled them flat, adding to the area for the murals. Panels crack so, as always on my restorations I strengthen the bottom half and added larger plates so the panels don’t crack and don’t fall off.

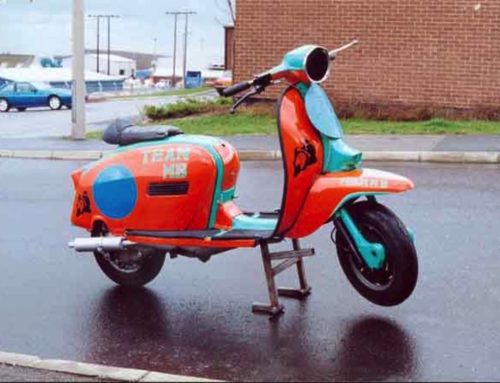
Using the Banksy murals I had the idea to make the base coat look like an old wall, with bricks and drips and fading to make it look weathered but using a Silver/Grey colour scheme making the murals stand out.

With most rebuilds there’s a budget and you try to stay within the budget the best you can. Things don’t always go to plan, I knew the budget and tried to work around the bike that was supplied.
The Scooter supplied was an Indian, never the best for a custom build but neither are the Innocenti ones! The basic bike had some reasonable parts already fitted, the shockers were new bgm ones, nothing wrong there – reuse them. Most of the bodywork was good and reusable. The main casings were good but most of the engine was scrapped. The front disc was a Vietnam version – never the best but not bad, it came with an extra anti dive – not my favourite and that nearly wrote off the new build! The exhaust was a JL/Taffspeed but was crushed up and had been welded in places, not to use! The Vietnam stainless 1 1/2 tank looked ok and was new, again not my favourite, but it saved finding a tank and toolbox – Oh how that would kick me in the balls as well.

You do your best to make things fit well, there’s lots of grinding, bending and welding to get things a bit better than you started. Then theres the blasting and painting and you always hope things go back together as it should. Do the basic hard work in the beginning and the rebuild should be a doddle – he says! But it takes an age to get everything to the standard I try to work to and it’s all money chipping away at that budget.
After the long wait for paint, it’s a rush to rebuild it – again he says! Hard to do when others are throwing work at you on a daily basis and bread and butter jobs usually come first. As with all oddball jobs I do – I have to get my head into it. Thats not so easy with everything going off at work. If my heads not in it, its not in it! But once my heads on the job, I crack on until I hit a brick wall. Most of that is great when you only have to walk a few feet and grab a new part off the shelves. But then theres the trip to the workshop to polish the odd part – then all the attention to detail on the rebuild – it’s all time and money!
With the engine prepared and ready to build, Stonki saw I had done a 35bhp motor for the road. He asked ‘can I have over 30bhp’? Arghhh double take on the 25-28bhp as he first requested. It’s easy to talk big horse power these days, but to build a motor, have the horses and have the most important thing – driva-bility and ride-ability and still have the speed and power. Now having driven a motorbike through Hamburg and Stonki had said he will probably never go out of Hamburg then I had an idea how it had to drive. Hamburg is all traffic and traffic lights. The engine needed to drive like a standard yet be able to open it up and shoot off like a sprint bike to the next set of traffic lights.

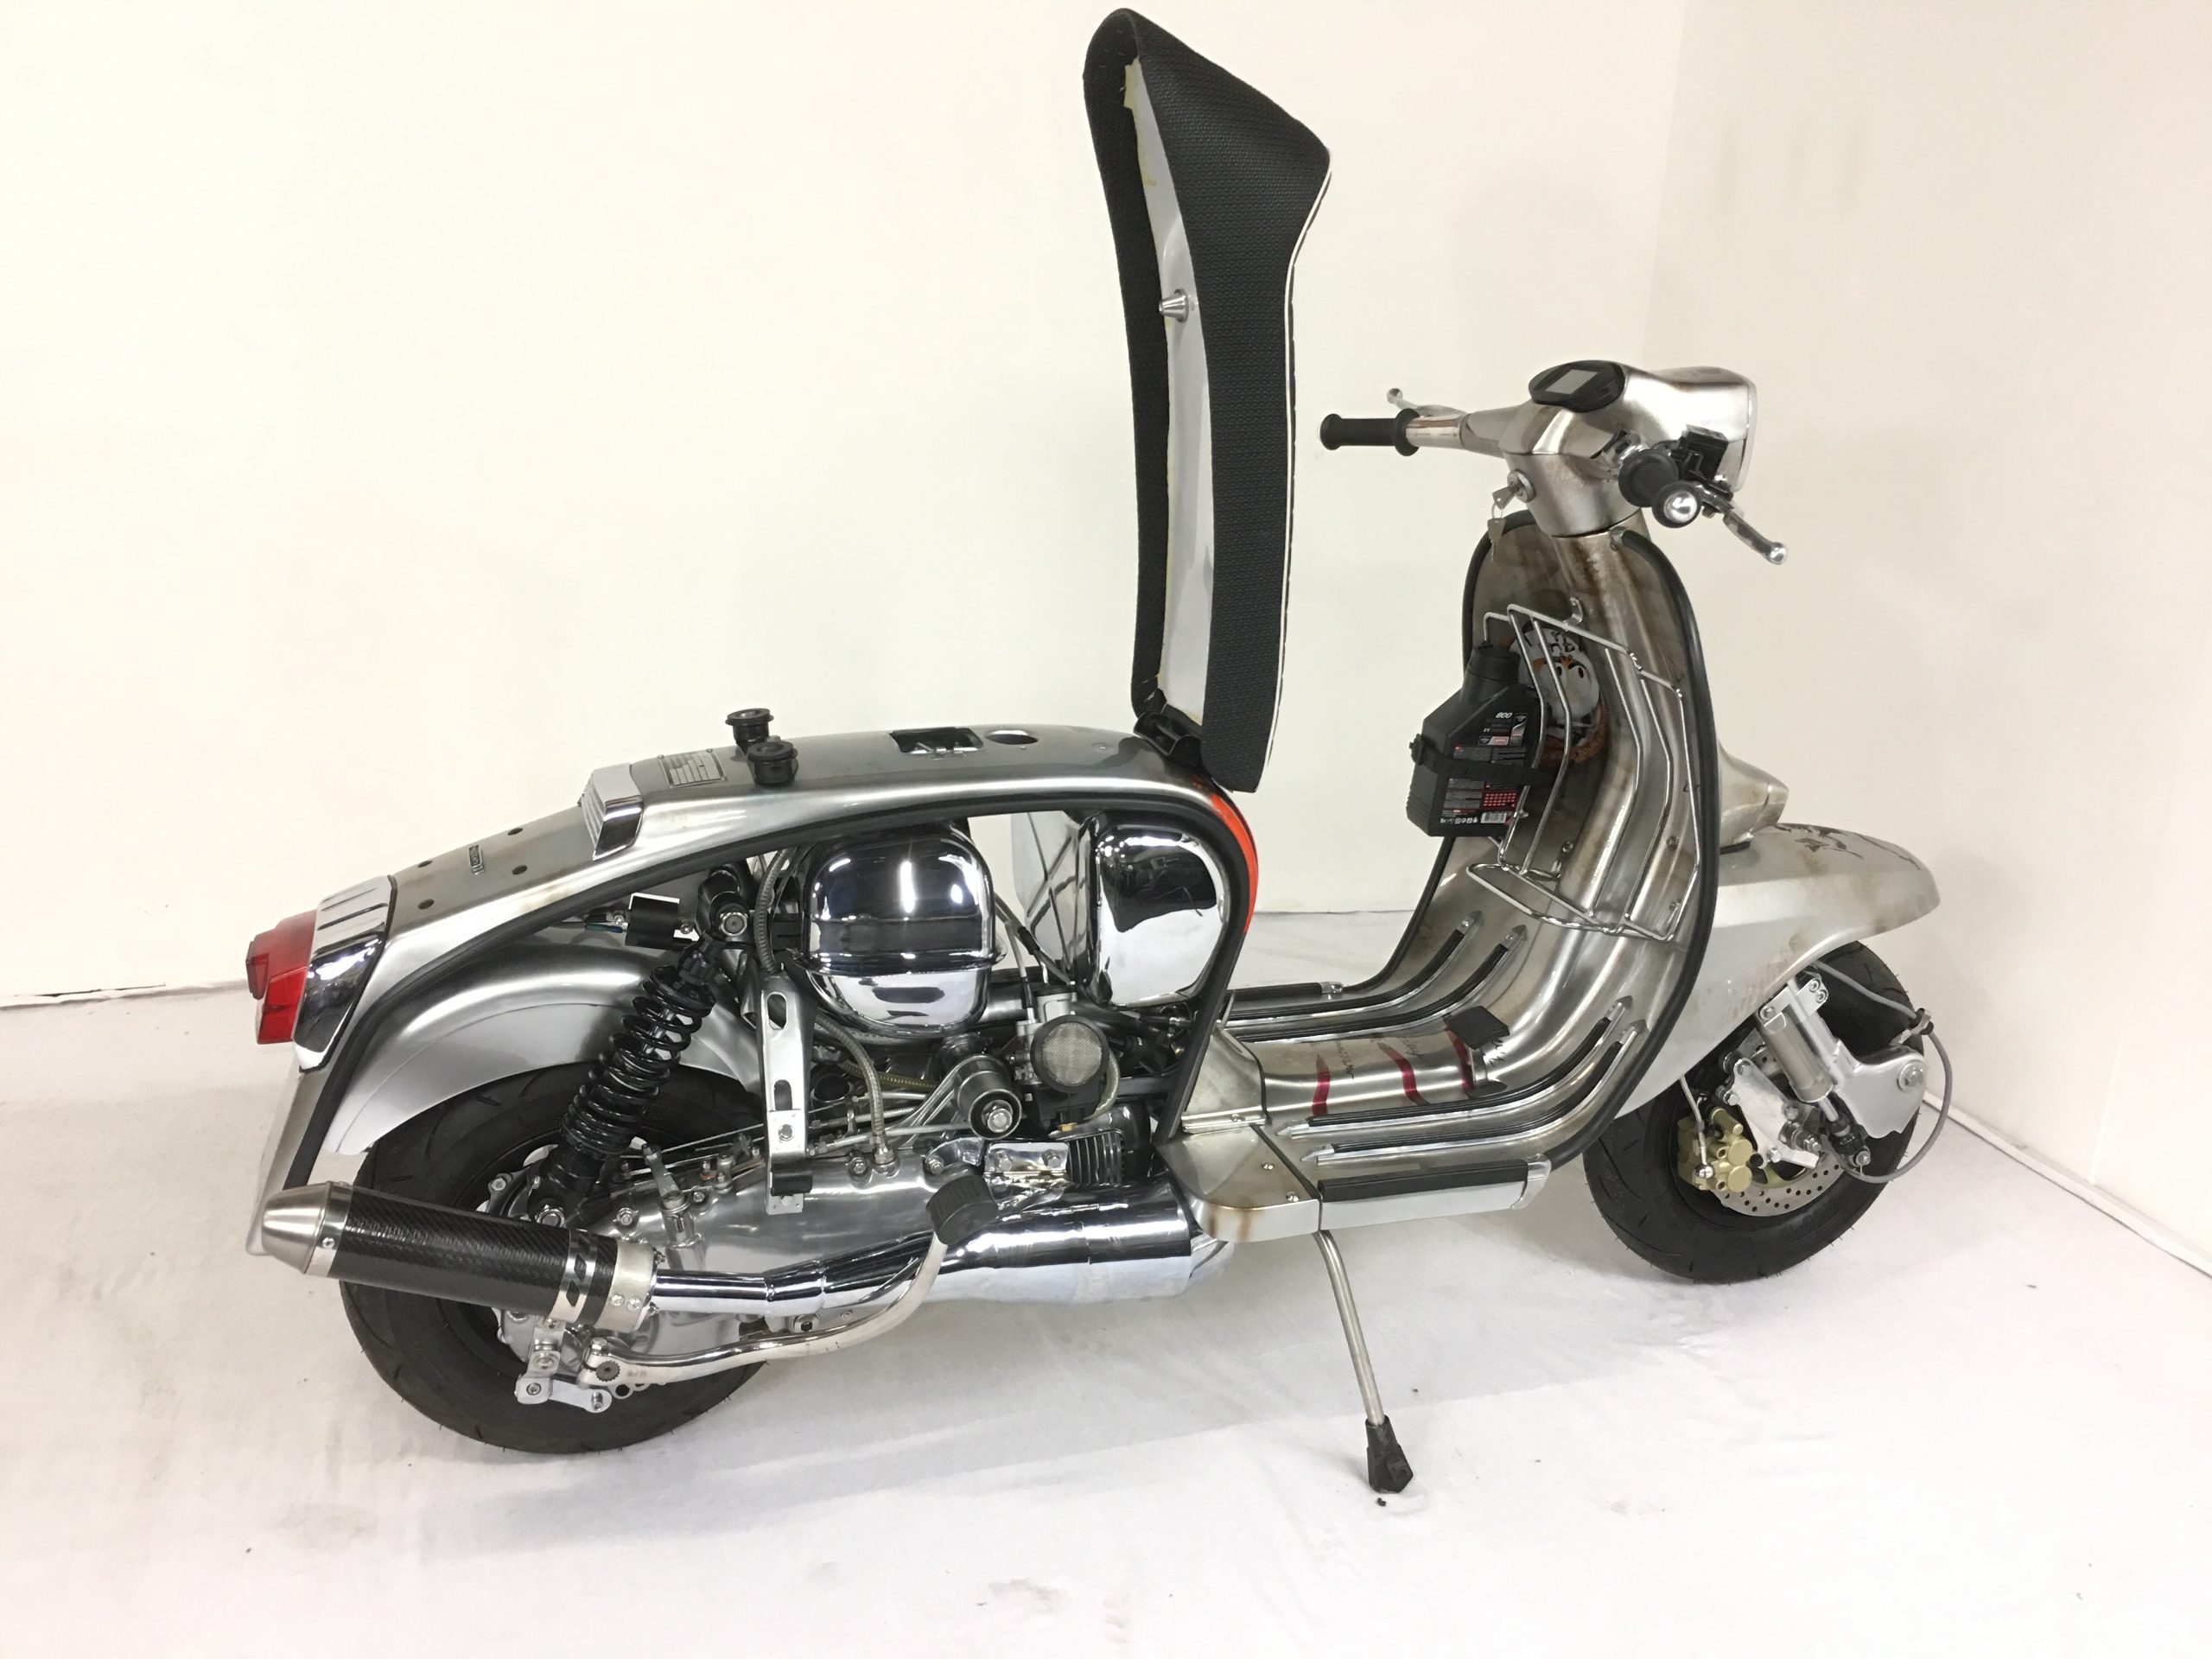
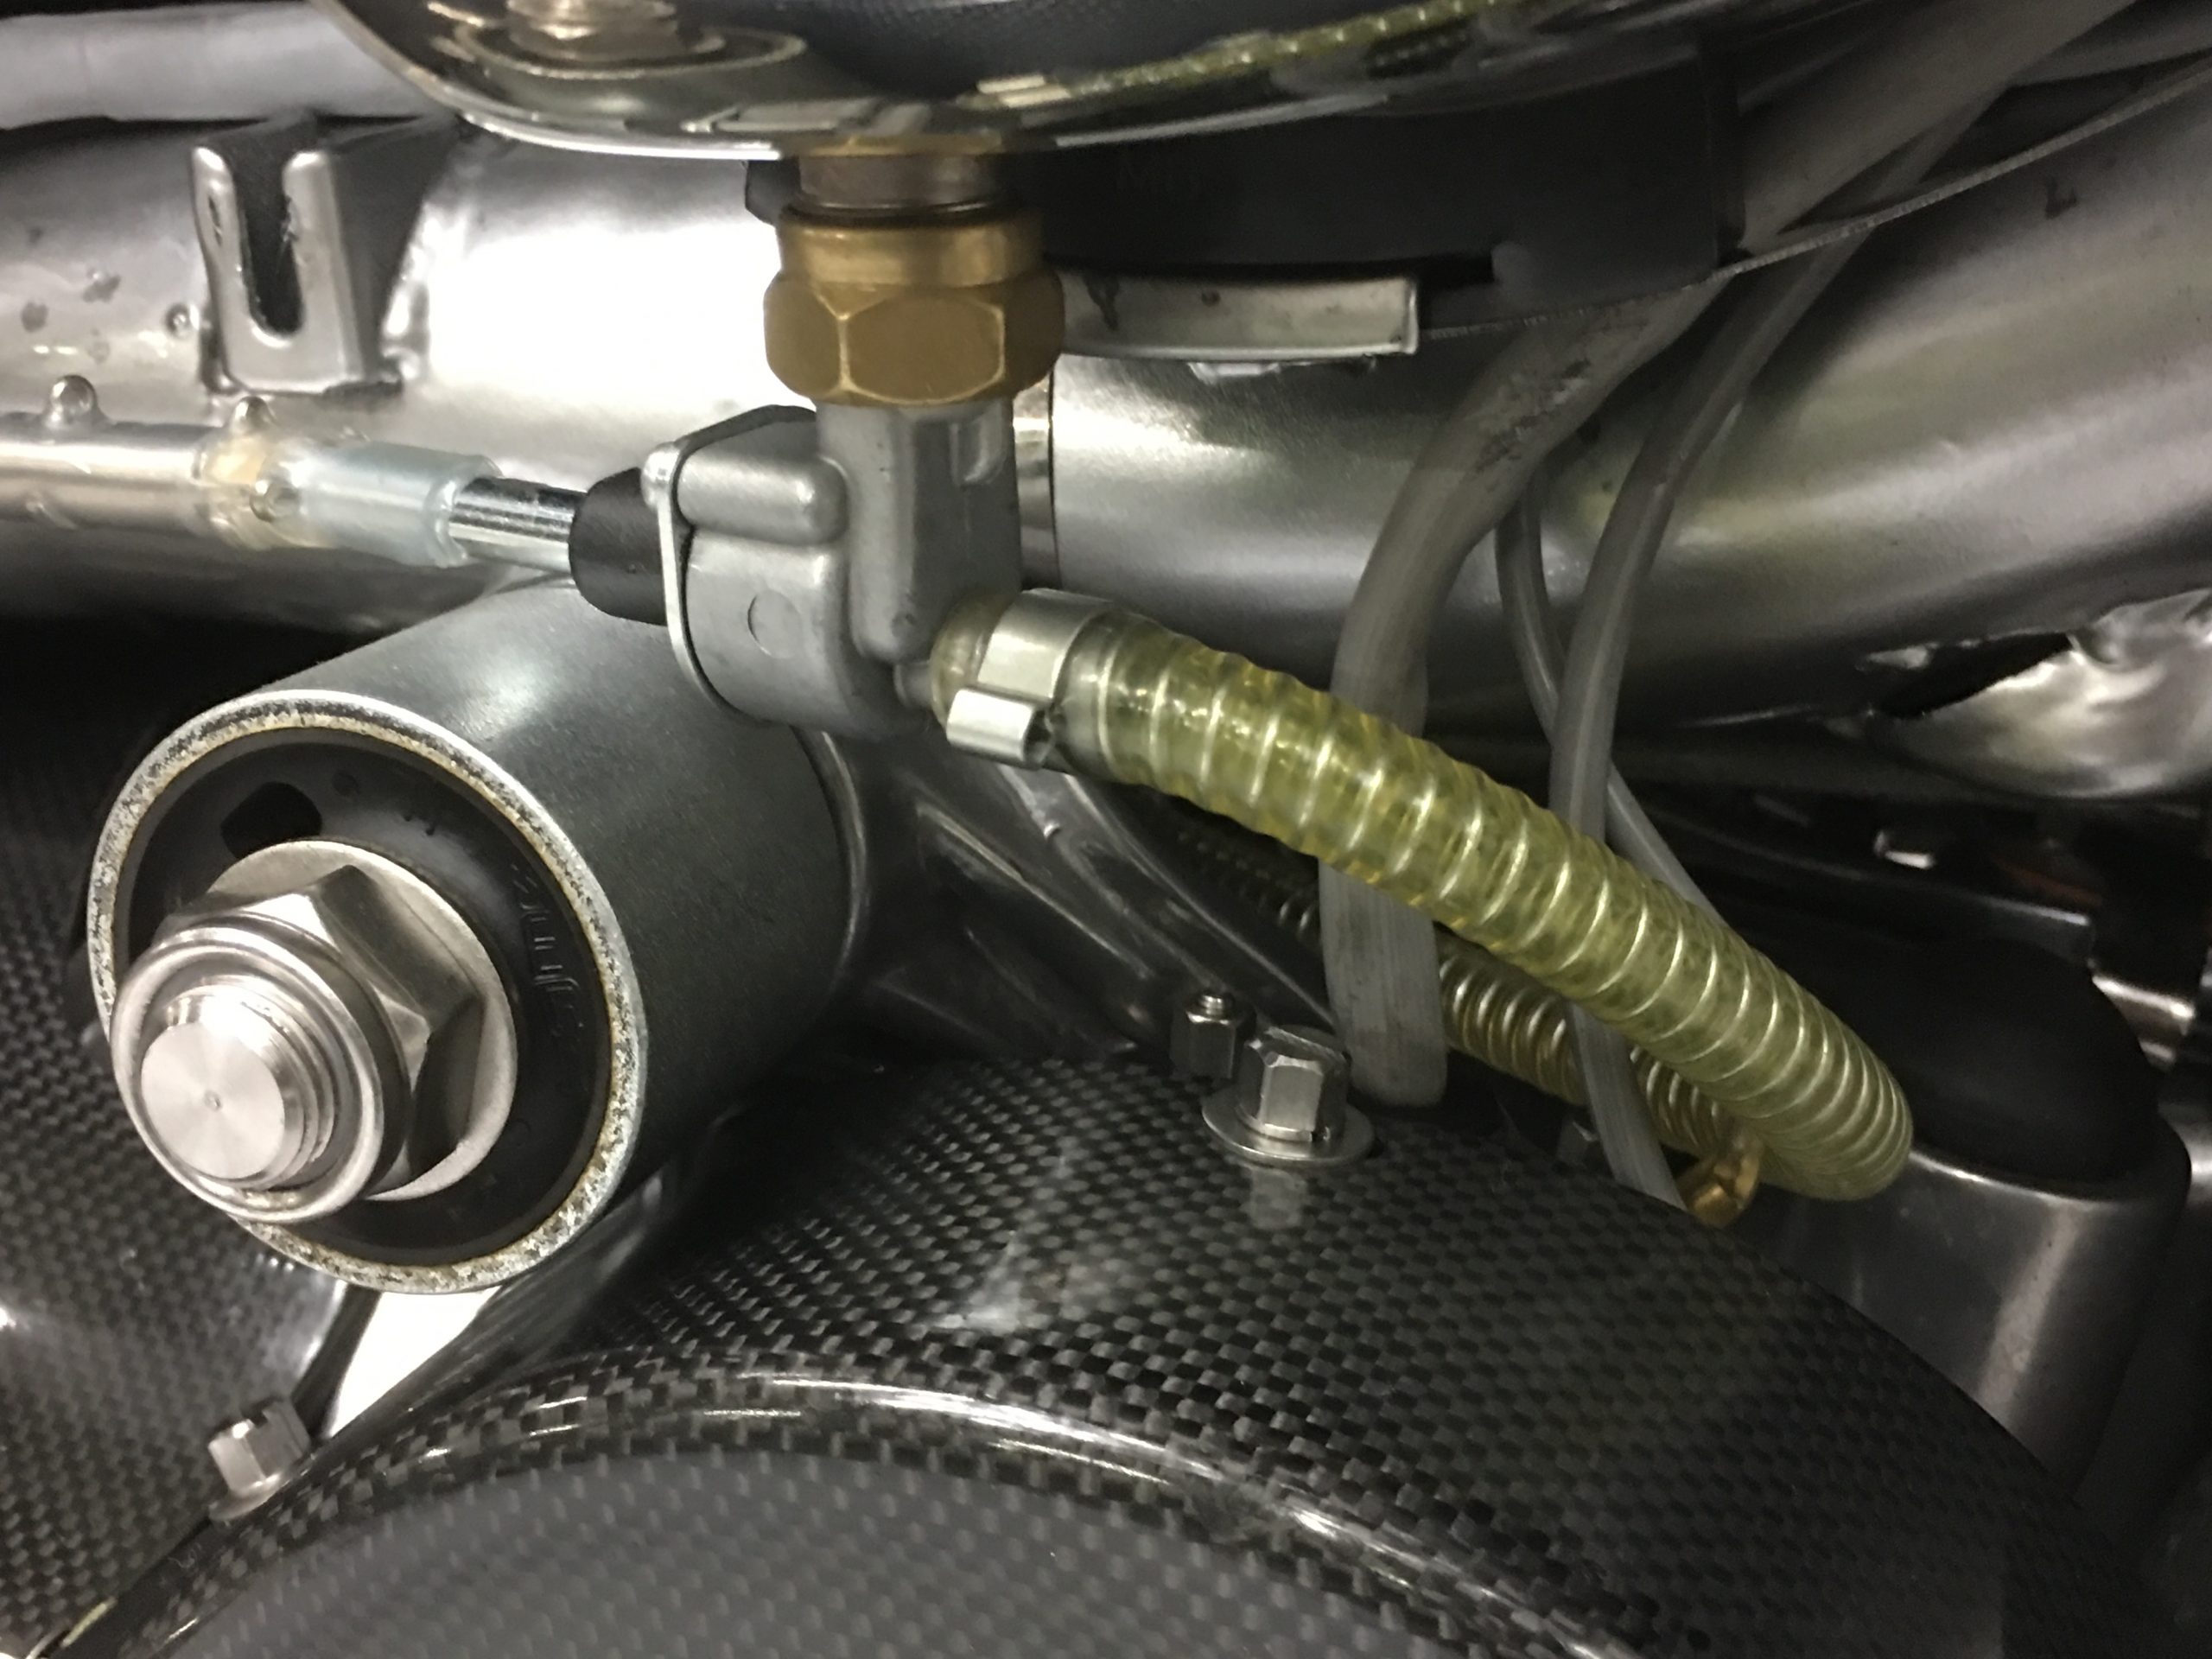
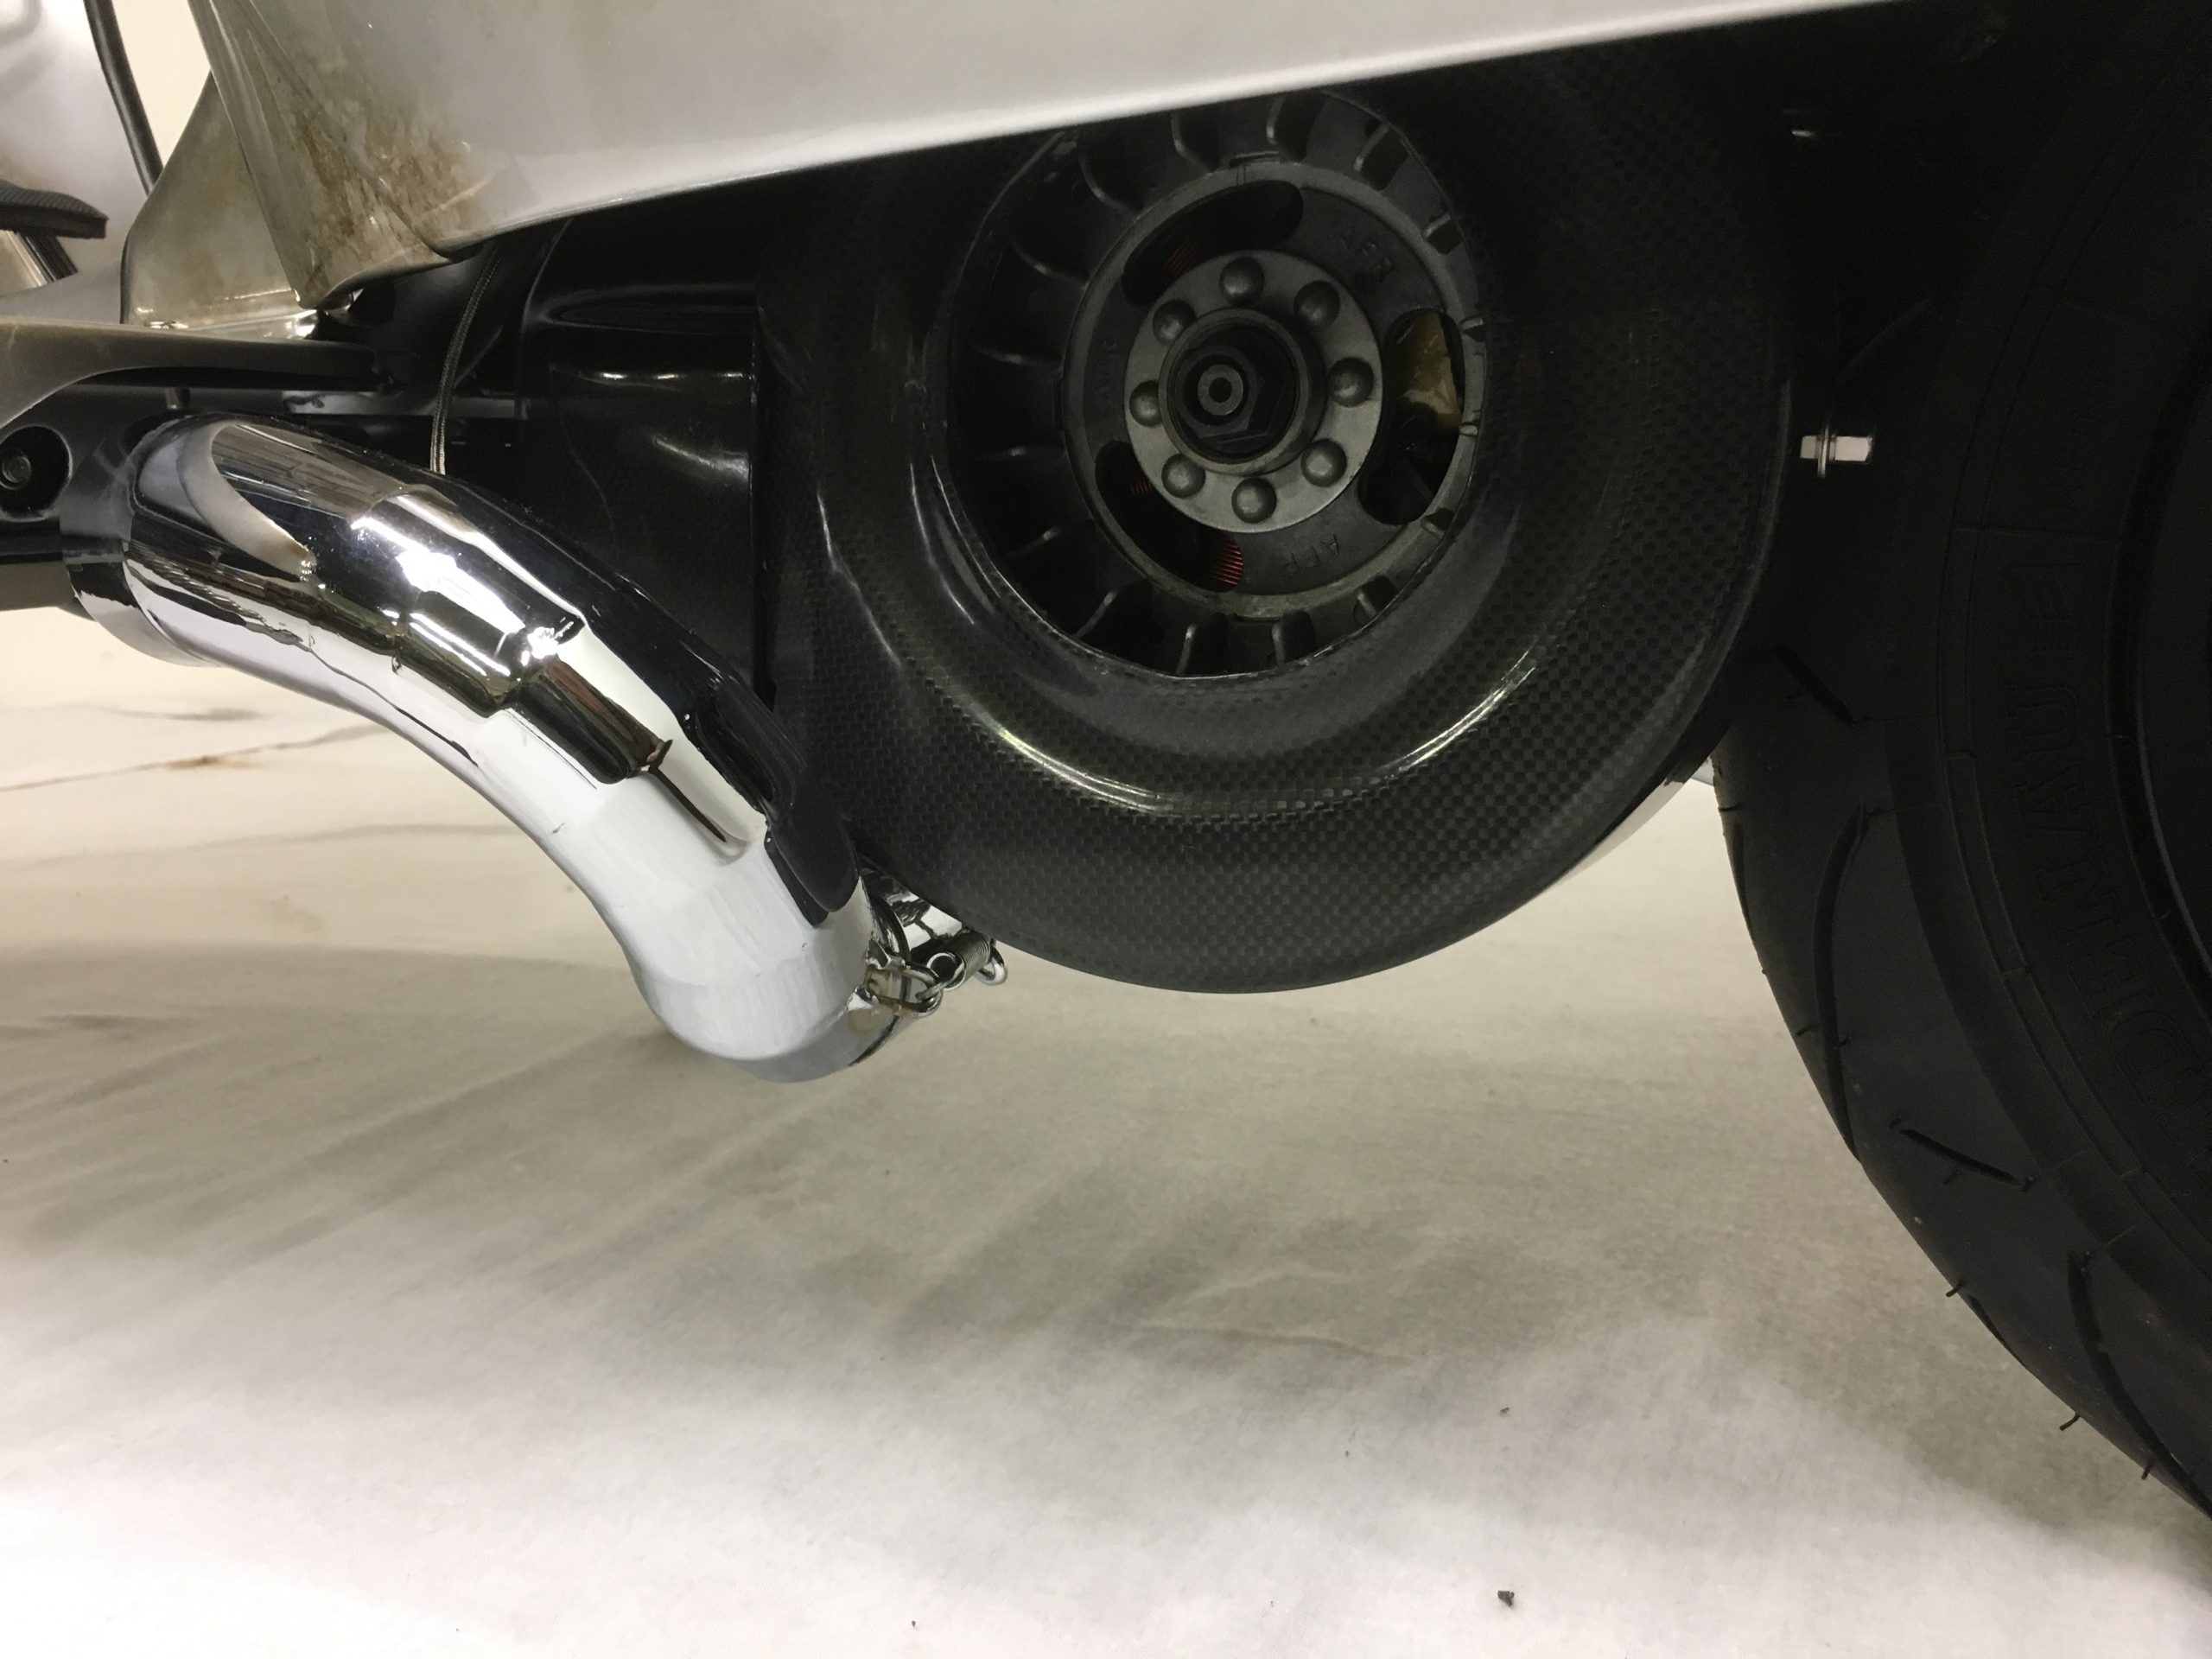
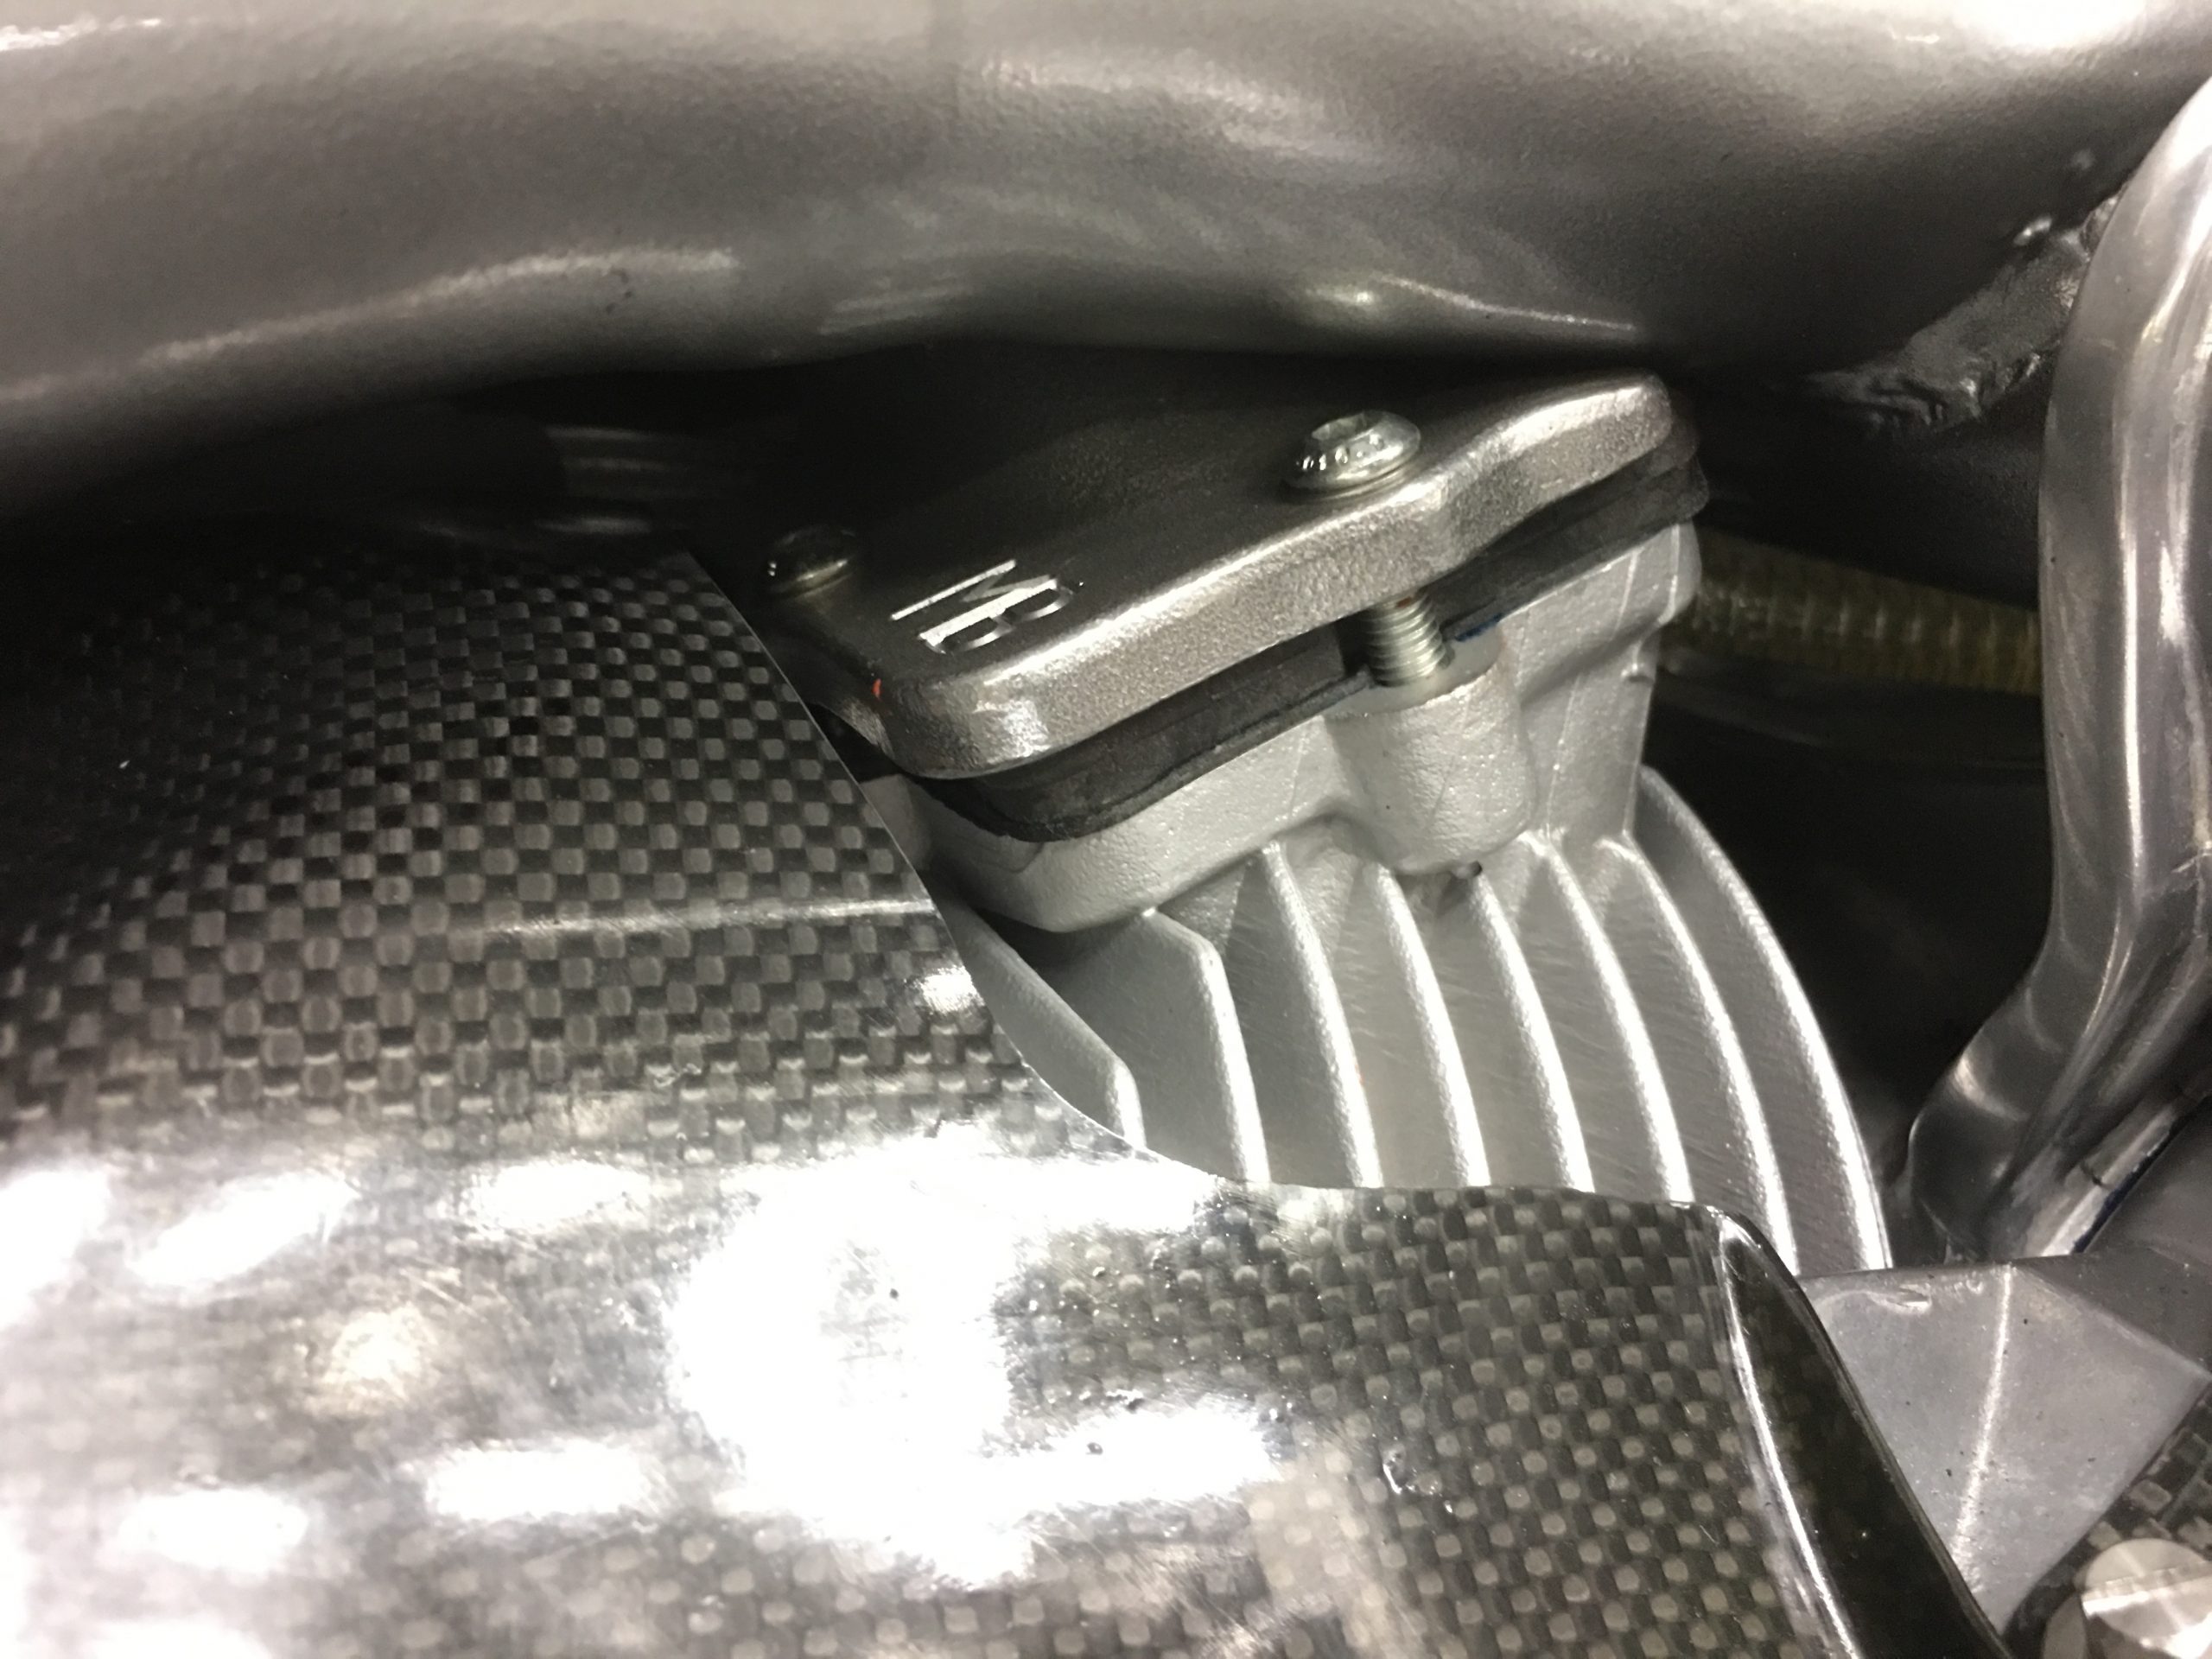
With this in mind the engine was rebuild based on a Ts1 bored out to one of our old Jet Skis piston conversions with a 60mm hand built crank using a Yamaha con rod giving 240cc. Stonki had seen we were making our 5 speeds gear boxes so wanted one, this increased the budget! So with the MB5 and geared to suit the traffic of Hamburg yet still be rideable and drivable and still produce a good top end speed, the clutch was one of our own MB CNC 5 plate types that we always use. I didn’t like the supplied TMX on the dyno tests so fitted a 30mm Dellorto PHBH mounted on one of our new down draft MB TS1 inlet manifolds. The bike came with an original 1980’s AF light flywheel, that was converted to use an external pick up and used a bgm 12 volt DC stator. I used our new Carbon head and flywheel cowlings and filled the flywheel to take up the space with the small finned flywheel to improve cooling. As usual all the parts were MB inside and out and finished off with our restoration polishing process.

I was thinking it would be easier later on for the German TUV to fit a German expansion, a regret as it took 8 hours to modify and make fit and lift it away off the floor. I should have made a one off – my own race expansion I saw 35bhp! On the final rebuild test with the modified exhaust is was a respectable 30bhp and 22 lbs torque – with a very low compression cylinder head making an ideal trash around Hamburg fun Scooter.
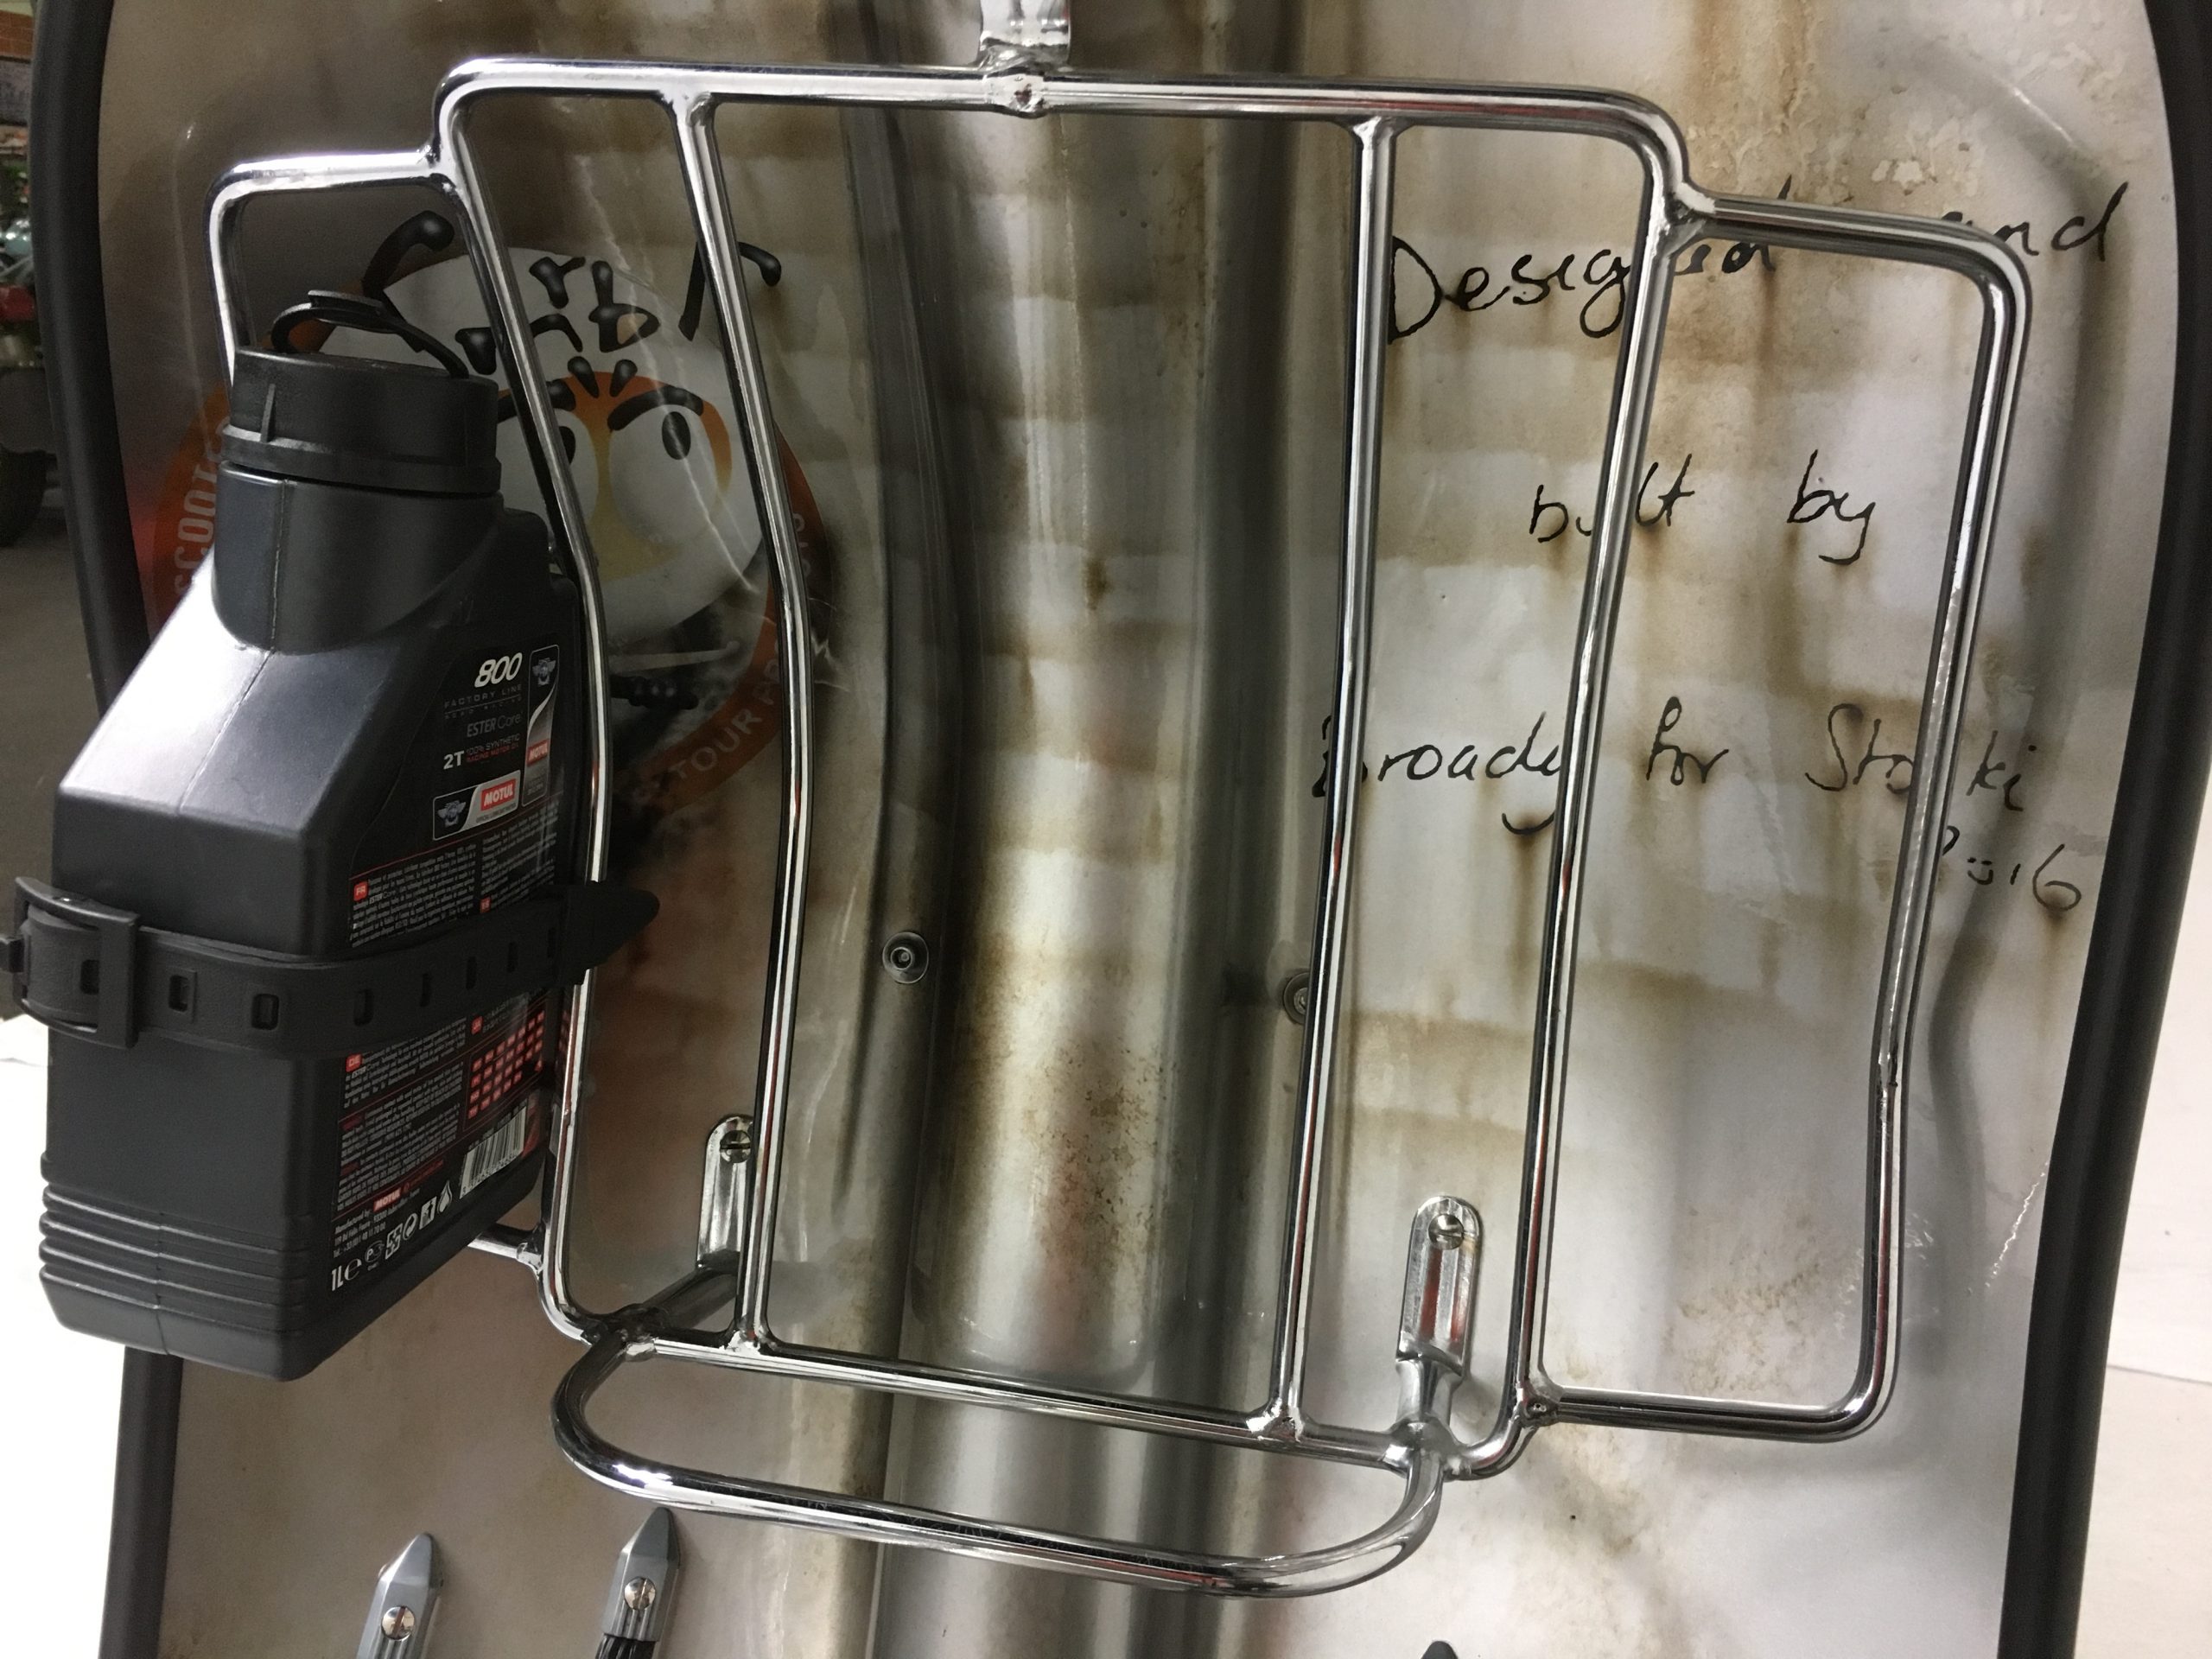
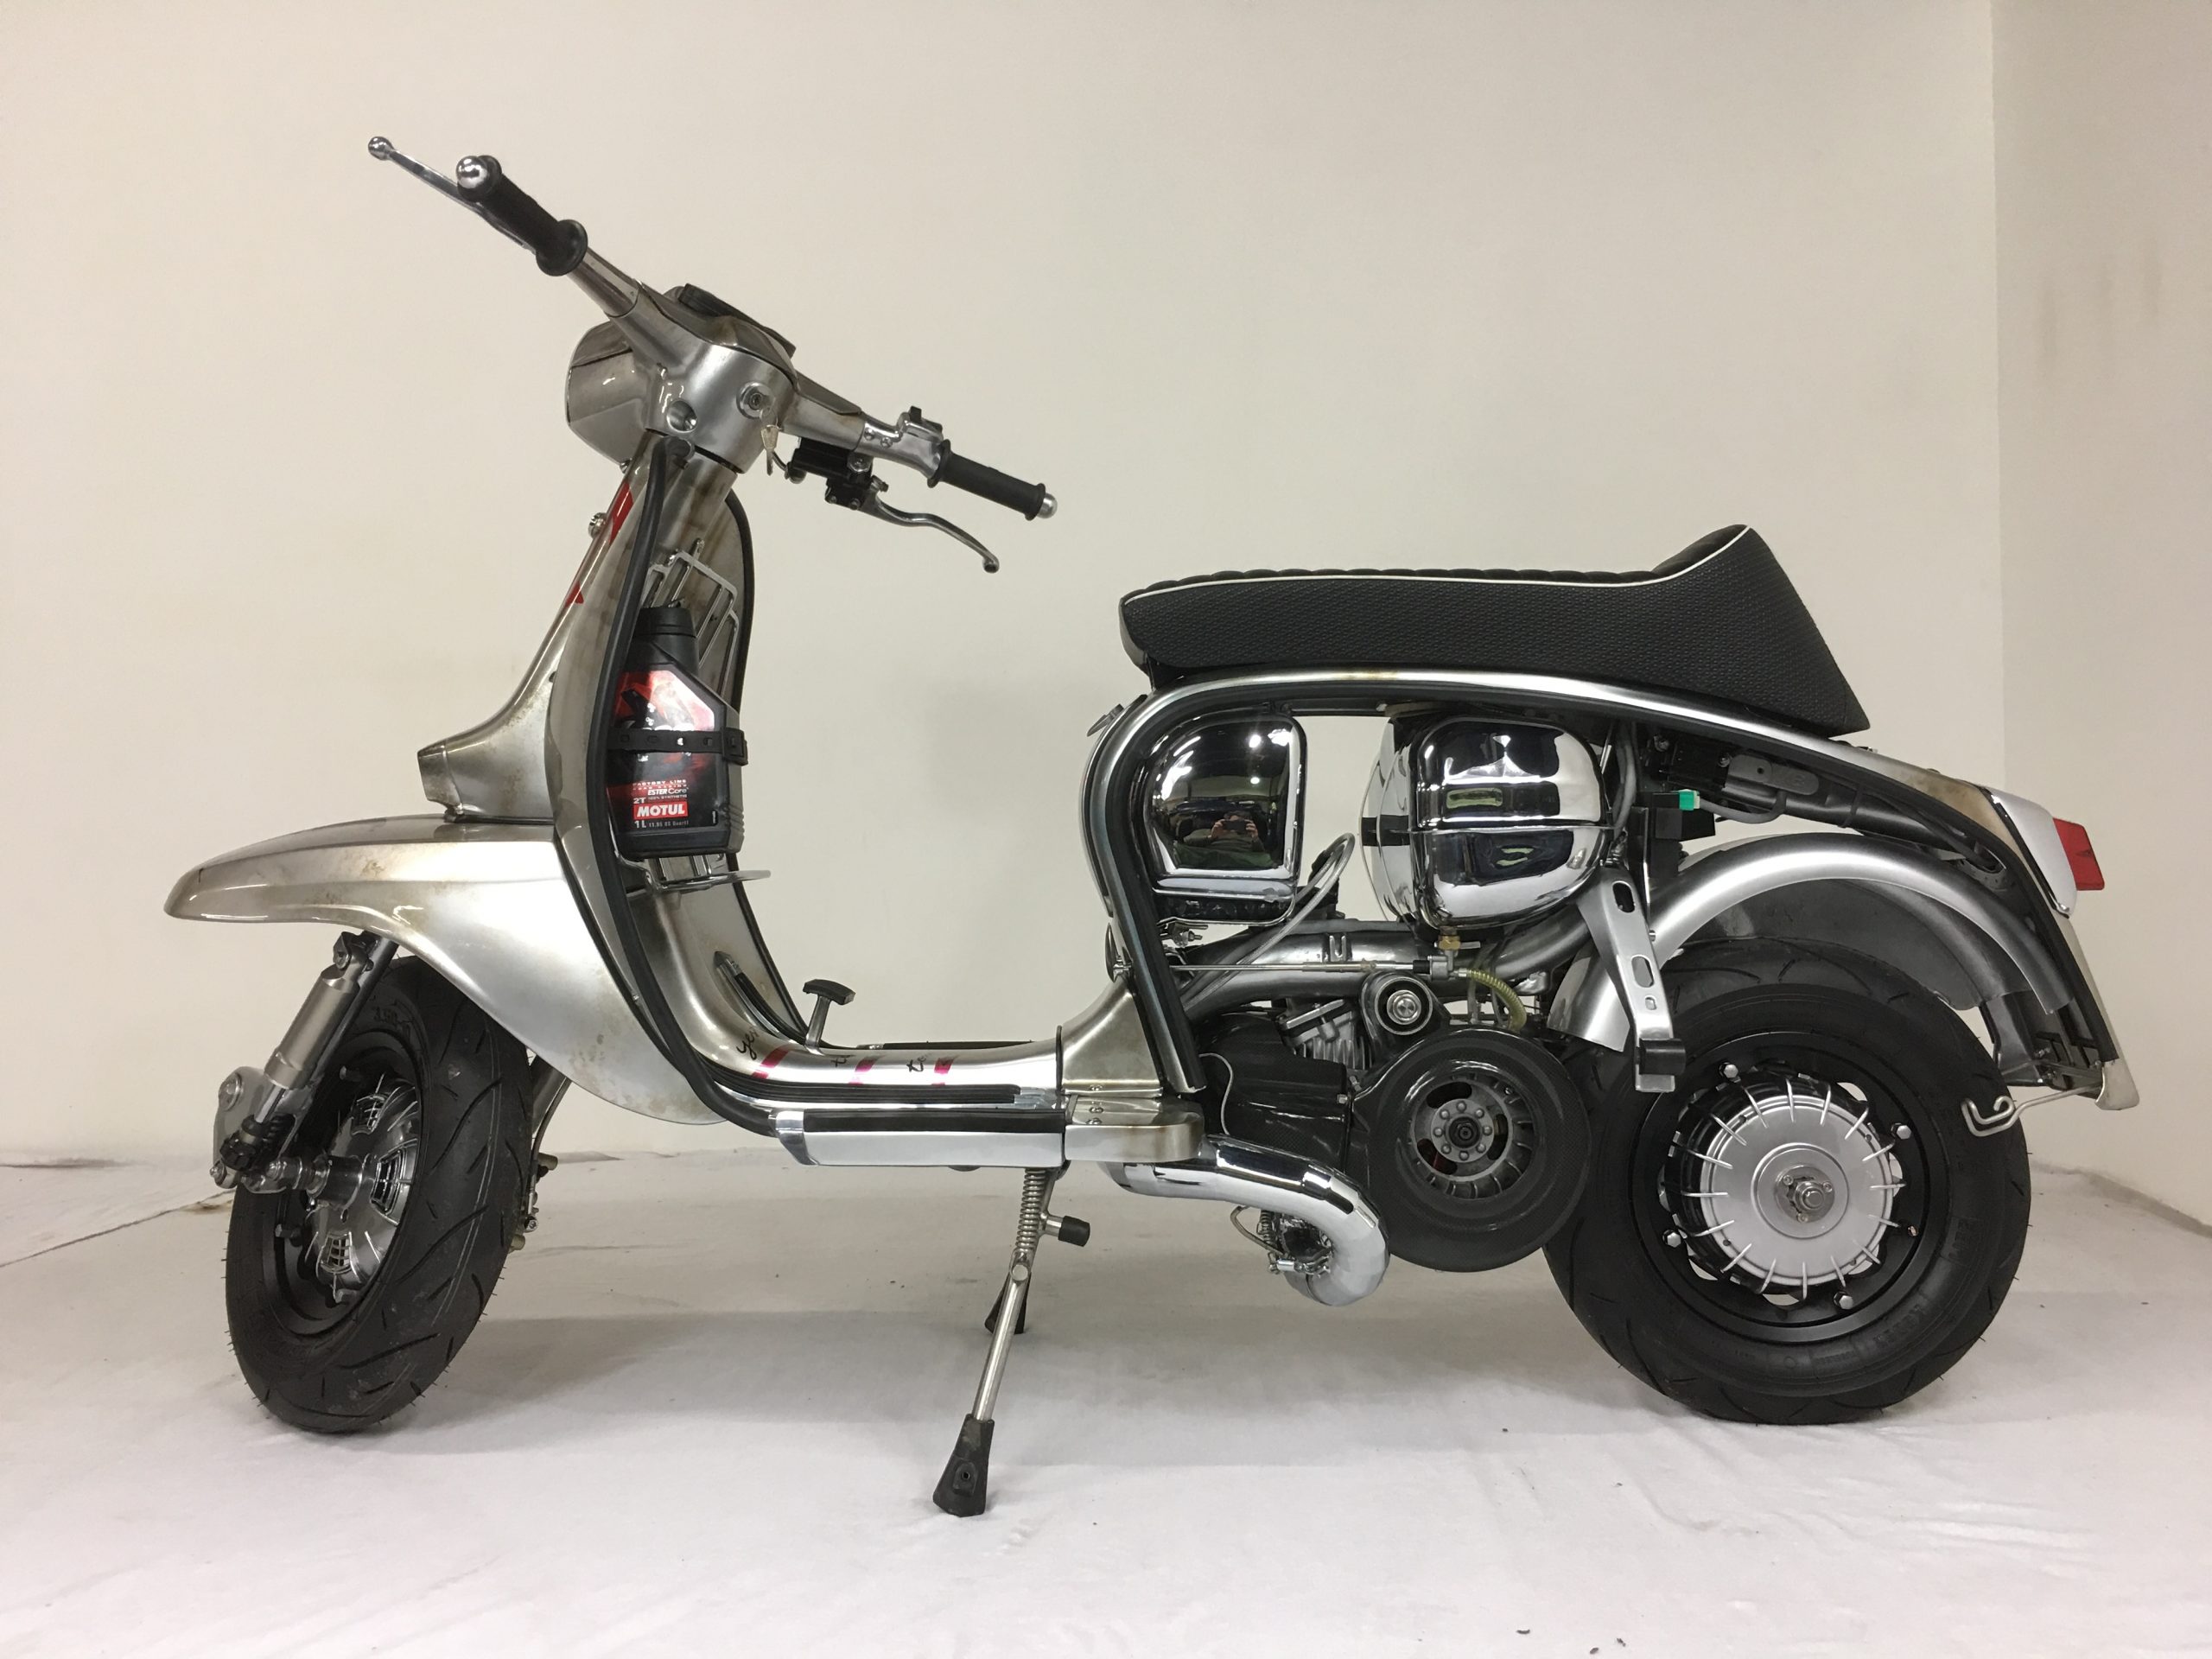
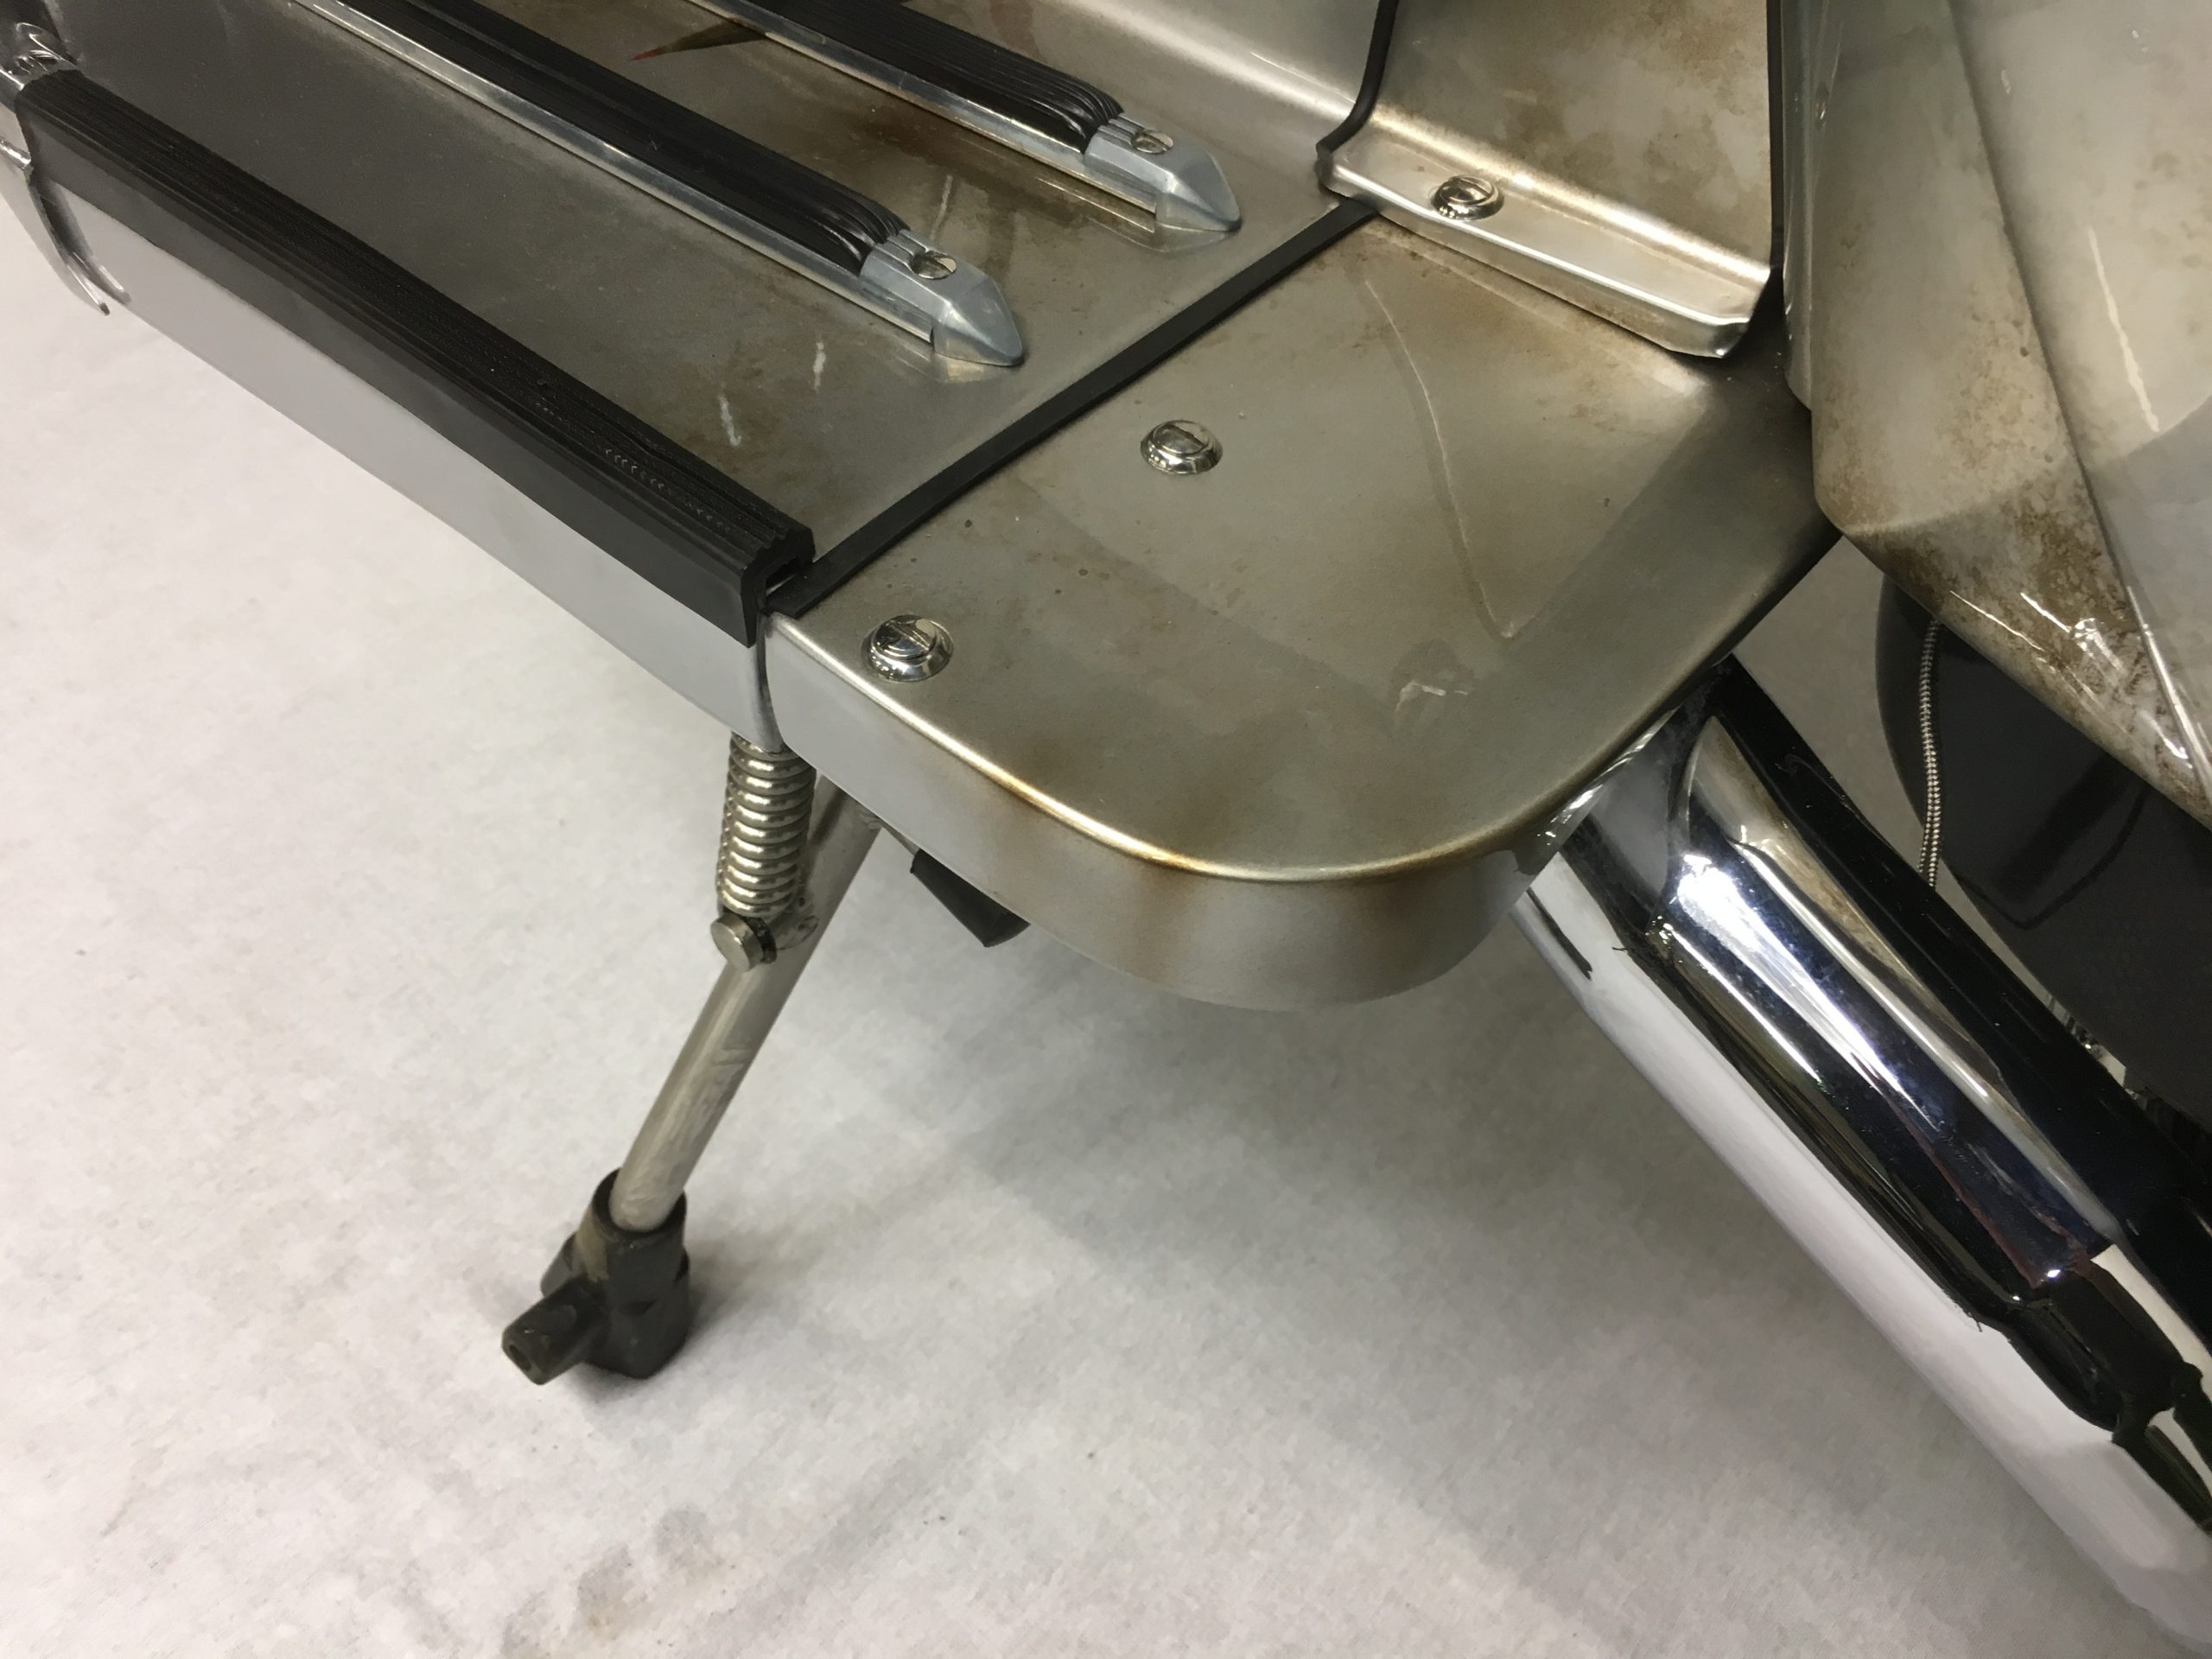
I reused the short running boards which helped show off the chromed exhaust on both sides. I used a MB cast alloy rear light. I made a one off legshield sprint rack designed to use his and one of our preferred 2-stroke oils – Motul 800. We used our preferred SIP matt Black alloy tubeless rims and fitted Heidenau K80SR supplied by Stonki as it’s the tyre brand they sell, a fantastic modern semi slick road race tyre – well up to the job. MB TZR grips and bar ends were used with MB dog legged levers and hydraulic housing – along with all our MB improved headset internals, making all the controls a doddle with simple light free movement. I kept the slope back seat supplied. Forks were all MB internals, as was the stainless steel braided cables. The rest of the bike we used our own stainless steel products, some were hand polished, some left semi polished and some left just stainless as it comes. All adding to the design base coat of the Scooter all different Greys and Silvers.
It was one of those bikes if you scratch it on a slip, you couldn’t see it – typical I didn’t scratch it.
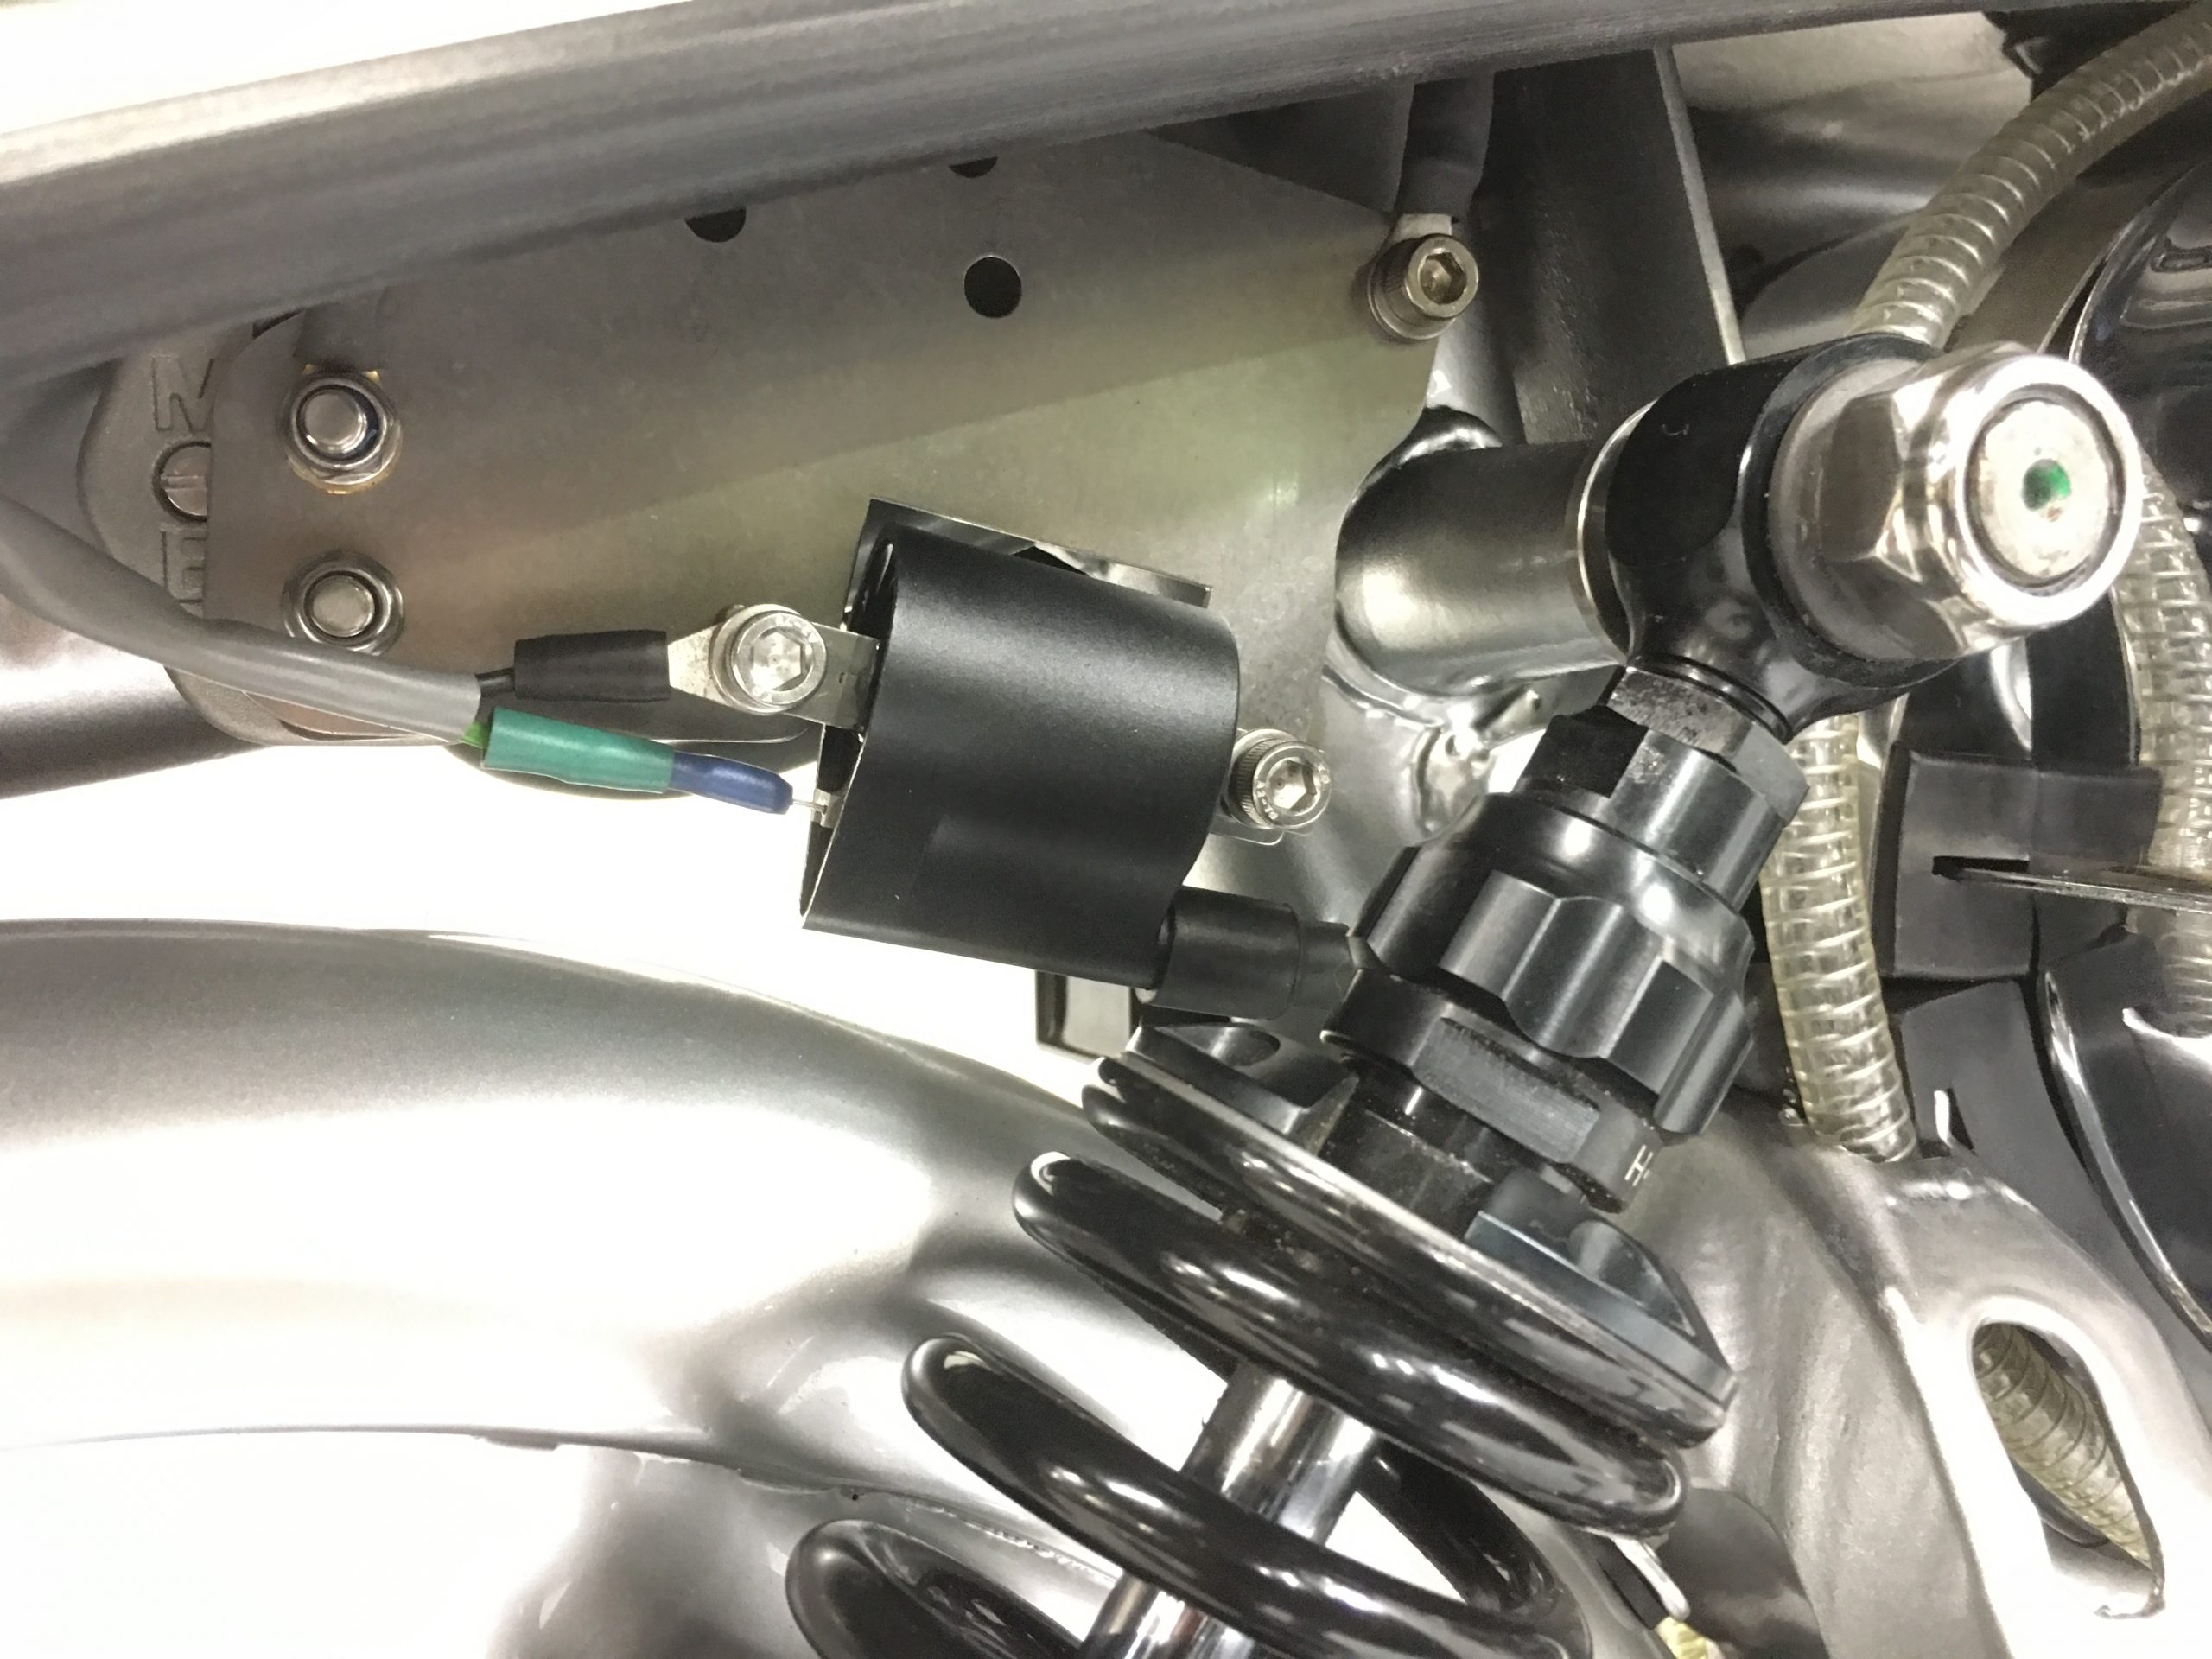
On the ignition side it’s clever, not simple to get your head around, but every wiring end was heat shrunk the correct colour so at the side of the road in the dark in the rain, a non mechanic could remove and colour code the wiring back to how it should be. This was a full 12 volt DC system. The Switch was full DC, in the off position the battery is dead and the ignition is dead. Turn one click and everything wakes up – just like a modern bike or car. The ignition uses an external pick up, if that fails theres another Red internal pulse coil wired ready to be swapped around. Both internal and external timings are fixed at what we have recommended for 20 years 17 degrees. And the ignition is a DC coil set up that sparks by pushing the kickstart with your hand!
When it came to the finish – I filled the tank and there was a leak on the seam, I tried to weld it but the seam just carried on cracking – I gave up what a pile of shite! I was trying to have it done for a big motorcycle expo so it was on show – that went out of the window! It was then a case of find a decent tank and toolbox! Something I should have found right at the beginning. With it only driving around Hamburg, a standard tank was ideal. Leaving the toolbox to be modified for a battery tray welded inside and then sent to the chromers. Now chromers – like painters have a mind of their own and had to chase it only to find they had polished through some welding and they had to send it away to be repaired before chroming again…. arghhh.
Eventually behind time the new tanks were fitted, the electrics hooked up and I stood back and said ‘I wish I did that in the beginning’.

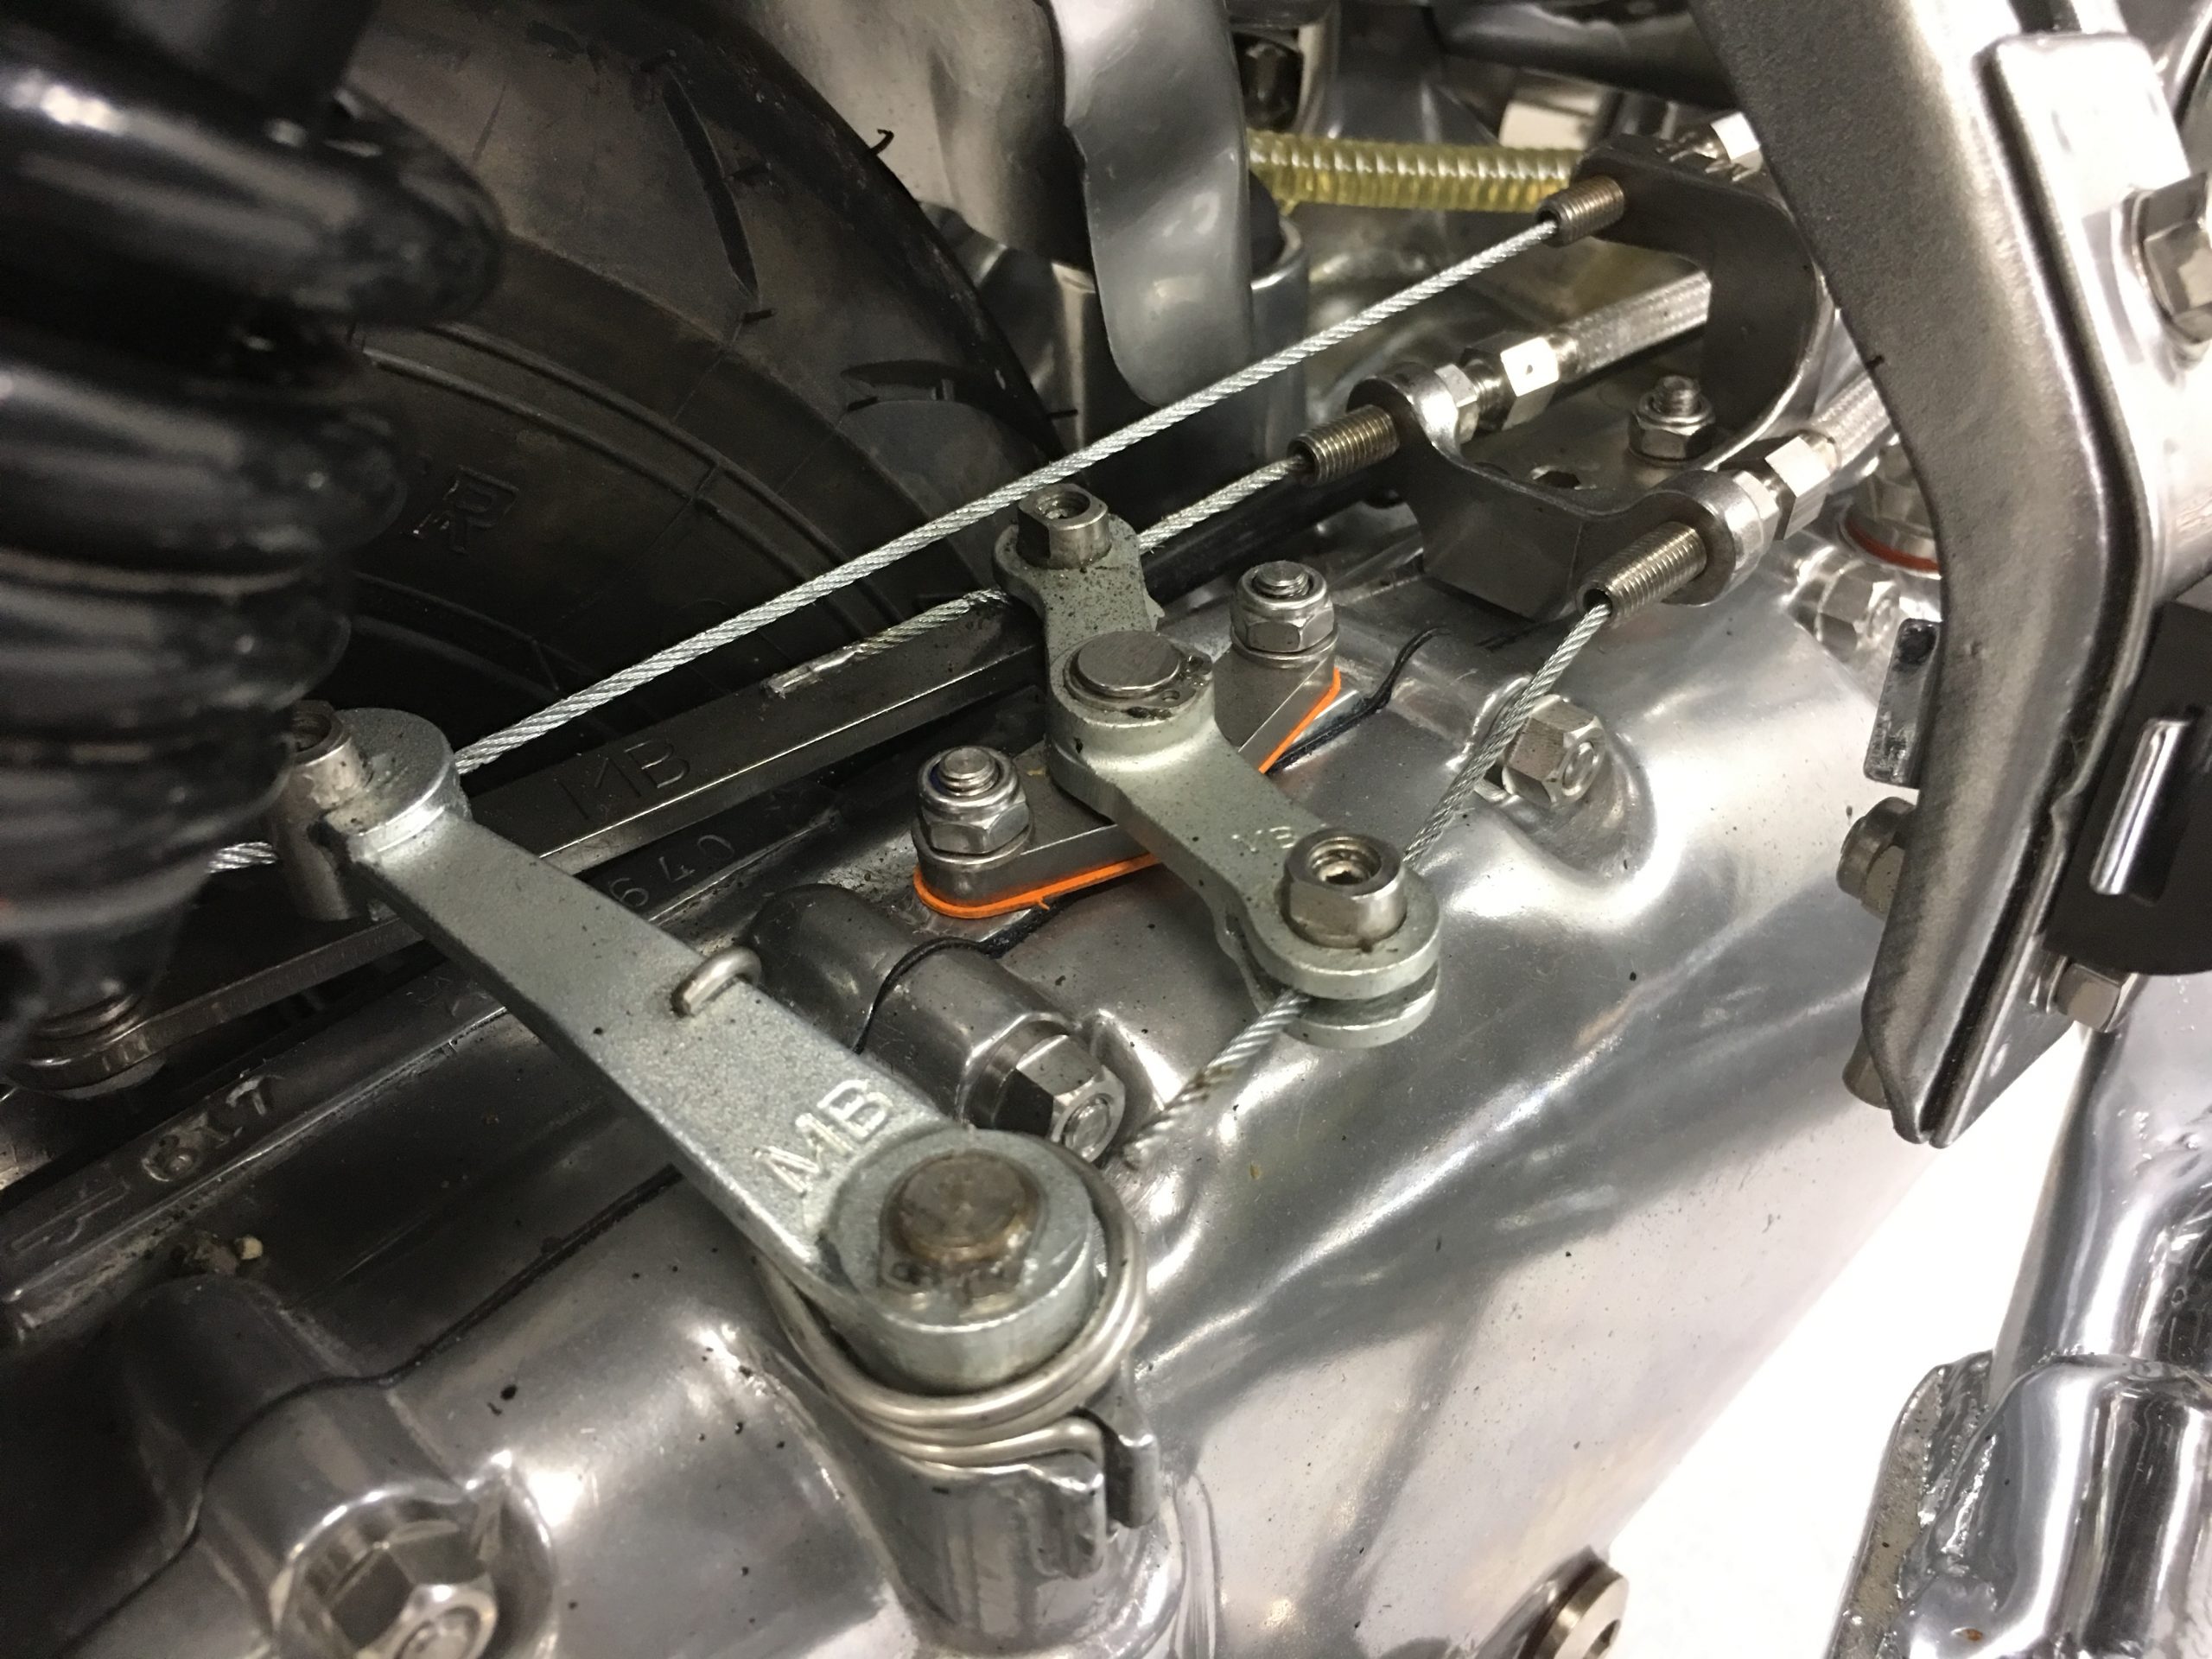
Filled with petrol, and fired up I got to run it on the drive. I wasn’t trying – it power wheelied in 1st and 2nd! On the road it went through the 5 gears perfectly going up our steep hill. At the top doing an emergency stop I thought the front wheel locked up. On inspection, the anti dive bar had locked on the disc……. argh, a strip down, regrind and alter the the positioning ruining the paint – other peoples products that didn’t fit and didn’t work – why do I do these things? I wish I made a MB outboard in the beginning. But your always thinking – the bill – you’ve got to tell them its gone up again and again – and it kills me and stresses me out, spoiling the job in the end.
And then theres all the little bits of detail, things only experts would see if they studied the bike. To say I’m anal is an understatement, I go home and fall asleep and wake up and think I’m going back in to do it again and take another few hours doing something that was perfectly good in the first place.
And thats it another custom top class bike coming out of MB Scooters one of a few lately.